
How to Set Up a Coffee Bar at Home: Step-by-Step Layout, Zones and Design Ideas
This post has affiliate links. If you buy through them, I may earn a small commission at no extra cost to you. As an Amazon Associate I earn from qualifying purchases. How I pick products
On this page
To set up a coffee bar at home, pick a spot with an outlet and 24 to 48 inches of clear counter, measure it, place the machine first, then add mugs, prep supplies and storage around it in four zones. Decor goes on last. That order matters more than any single product, because it stops you buying things that don’t fit.
This guide walks through the setup in 10 steps with the measurements for each, then the four-zone layout, 6 design ideas, small-space setups, how to keep it organized, and what a home coffee bar costs. It’s part of our coffee station ideas series.
How I researched this: the measurements come from building and electrical guidance (Bob Vila, Angi and the National Electrical Code as summarized by electrical trade publications) and from machine makers’ manuals and spec sheets. The products are research-based picks from Amazon listings, compared on October 24, 2026, not hands-on tests.
What a good coffee bar setup includes
A good coffee bar setup has 4 zones and 3 basics. The zones are where things go; the basics decide whether the spot works at all.
The 4 zones:
- Brew zone: the machine, plus the grinder if you use one. It sits in front of the outlet.
- Prep zone: syrups, sugar, spoons, a frother, and milk if you have a fridge nearby.
- Mug zone: the mugs you use daily, on a tree, hooks or a shelf.
- Storage zone: beans, filters, pods and backstock, above or below the counter.
The 3 basics:
- Power: a grounded outlet the machine’s cord reaches without strain.
- Water: the sink within a few steps, or a filter pitcher.
- Landing space: about 8 inches of clear counter at the front to set a mug down and pour.
How to set up a coffee bar at home, step by step
These 10 steps take a weekend at most, and most of it is measuring and moving things.
Step 1: Decide what you’ll actually brew
Your brew method decides the size of everything else. A pod brewer under 5 inches wide fits almost anywhere; an espresso machine with a grinder and knock box needs 30 inches or more. Write down what you drink on a normal weekday morning, not what you’d like to drink once a month.
Step 2: Pick the spot
Look for 3 things together: an outlet, a clear run of counter and a short walk to water.
- Kitchen counter: the easiest choice, since kitchens have outlets every few feet by code.
- A cabinet, sideboard or cart: works in a dining room or living room if an outlet sits within cord reach.
- Avoid: the stretch right next to the stove, where grease settles on mugs, and spots where a cord would cross a walkway.
Step 3: Measure before you buy anything
Measure 5 numbers and write them down:
- Wall or counter width you can give the coffee bar.
- Counter depth. A standard counter is about 25 inches deep.
- Gap to the upper cabinets. The standard is 18 inches, according to Angi’s cabinet spacing guide.
- Machine height with the lid, handle or hopper open, plus 2 to 3 inches for your hand.
- Distance to the outlet along the wall.
The machine has to sit forward of the upper cabinets, or somewhere without them, when number 4 is bigger than number 3.
Buy first
STANLEY 25-Foot Tape Measure (33-425)
- Best for
- Measuring the wall, counter depth and cabinet gap before buying
- Why it's here
- A classic 25-foot tape measure. The first thing to buy for a coffee bar, because every other purchase depends on the numbers it gives you.
- Watch out
- Measure the machine with its lid open, not just closed.
- Price
- $ · Save
What we like
- Pro: Measures wall, depth and clearance
- Pro: Locks open for one-person measuring
Keep in mind
- Con: You may already own one
Check Price on Amazon for STANLEY 25-Foot Tape Measure (33-425) (opens in a new tab)
Affiliate link · Price may change
Step 4: Check the outlet and the circuit
Kitchen counter outlets in US homes are built to a code that suits coffee gear. The National Electrical Code calls for a receptacle at every counter space 12 inches or wider, spaced so no point along the wall is more than 24 inches from one, on at least two 20-amp circuits, with GFCI protection. That’s the “coffee maker with a 2-foot cord” rule electricians use.
The catch is watts. A 20-amp, 120-volt circuit carries 2,400 watts. Espresso machines and electric kettles often draw 1,200 to 1,600 watts each, so running both on one circuit can trip the breaker.
- Read the label under your machine for its watts.
- One heating appliance per outlet, plugged straight into the wall.
- Extension cords: Breville’s manuals allow one only if its rating is at least the appliance’s, it has a 3-prong grounding plug, and it doesn’t drape over the counter. A cheap power strip doesn’t meet that.
- Outside the kitchen, dining and living room outlets may sit on a 15-amp circuit (1,800 watts). Ask an electrician before you run an espresso machine there every day.
Wrap extra cord on the back of the machine so nothing hangs over the counter edge, as Breville’s manuals ask.
Cord management
Lancord Appliance Cord Organizer, 8-Pack
- Best for
- Tidying cords on a counter or cart coffee bar
- Why it's here
- Stick-on cord wraps for the back of a coffee maker, grinder or kettle. Wrap the extra cord so it doesn't hang off the counter edge.
- Watch out
- Don't wrap a cord tightly while the appliance is hot, and leave a loose loop at the plug.
- Price
- $ · Save
What we like
- Pro: Hides extra cord
- Pro: No tools
- Pro: Eight pieces cover a whole bar
Keep in mind
- Con: Adhesive can lift on textured plastic
- Con: Not for heating surfaces
Check Price on Amazon for Lancord Appliance Cord Organizer, 8-Pack (opens in a new tab)
Affiliate link · Price may change
Step 5: Place the machine
Put the brew zone in front of the outlet, pushed back but not touching the wall. Leave a little air behind for the cord and steam. Slide the machine forward of any upper cabinet if its lid-open height doesn’t fit under it.
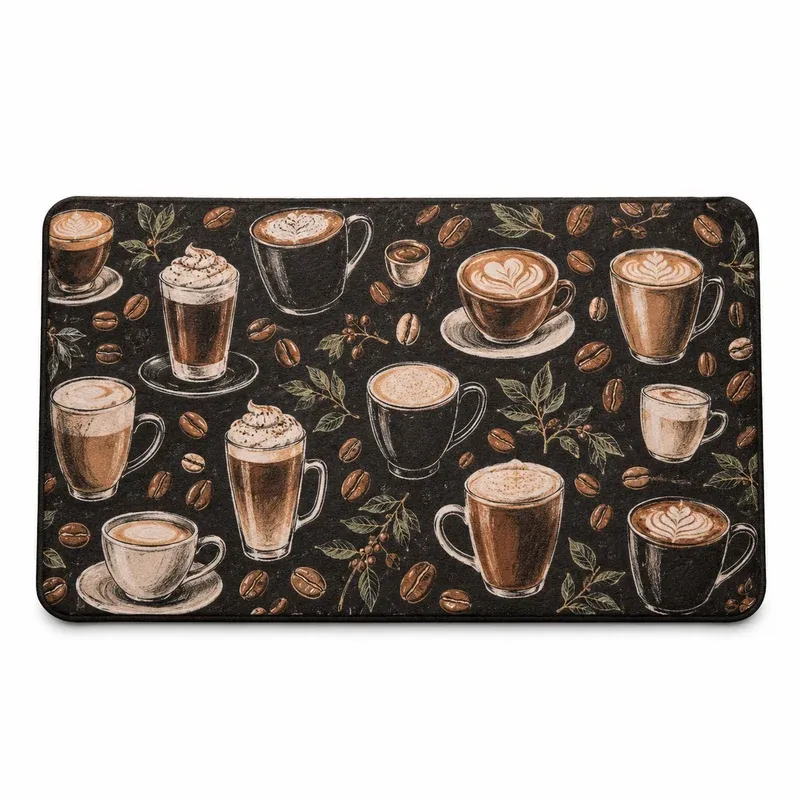
A mat under the machine protects wood, laminate and stone from drips and syrup rings.
Under the machine
Drymate Coffee Maker Mat, 12 x 20 in
- Best for
- Protecting butcher block, marble or laminate under the machine
- Why it's here
- Absorbent fabric mat with a waterproof, slip-resistant backing that sits under the brewer and catches drips, grounds and syrup rings.
- Watch out
- Fabric top, so it stains with time; wash it on delicate and hang dry, no bleach.
- Price
- $ · Save
What we like
- Pro: Absorbs 4x its weight in liquid (maker claim)
- Pro: Low profile, the brewer stays level
- Pro: Doubles as a mug drying mat
Keep in mind
- Con: Pattern choices are coffee-themed
- Con: 12 in deep won't cover a deep espresso machine
Check Price on Amazon for Drymate Coffee Maker Mat, 12 x 20 in (opens in a new tab)
Affiliate link · Price may change
Step 6: Sort out water
The sink within a few steps is enough. A filter pitcher becomes the water zone when the coffee bar sits in another room or your tap water tastes of chlorine: fill it once in the morning and refill the reservoir from it.
For bars away from the sink
Brita Large 10-Cup Water Filter Pitcher
- Best for
- Coffee bars away from the sink, and towns with chlorinated tap water
- Why it's here
- A 10-cup filter pitcher that reduces chlorine taste. Filling the brewer from a pitcher means your coffee bar doesn't have to sit by the sink.
- Watch out
- Filters need changing about every 2 months; set a reminder.
- Price
- $ · Save
What we like
- Pro: Lets the bar sit away from the sink
- Pro: Better-tasting water for coffee
- Pro: Fits most fridge shelves
Keep in mind
- Con: Filters are an ongoing cost
- Con: Filtering is slow when you're in a hurry
Check Price on Amazon for Brita Large 10-Cup Water Filter Pitcher (opens in a new tab)
Affiliate link · Price may change
Step 7: Add the mug zone
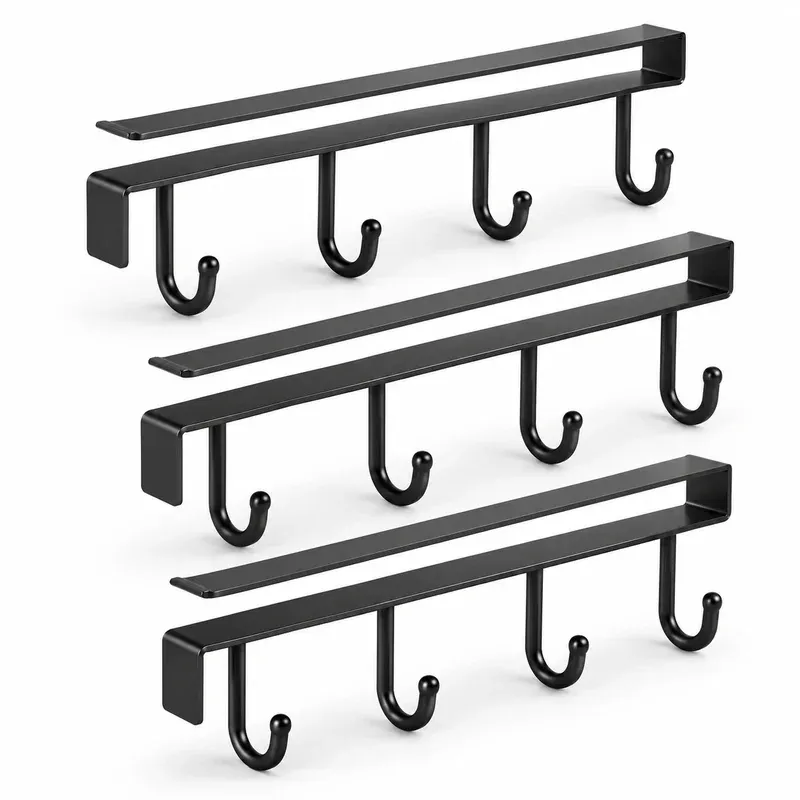
Put mugs on the side of the machine you pour from, within one arm’s reach. Two mugs per person in the house plus two for guests is plenty out on display. Hang them under the upper cabinets if there’s room above the prep side, or use a mug tree that needs no drilling. Our mug display ideas cover 15 options with the clearance math.
No-drill hooks
Luckinow Under Cabinet Mug Hooks, 3 Pack (9 Hooks)
- Best for
- Freeing counter space in a small kitchen coffee bar
- Why it's here
- Three steel racks that slide onto a cabinet shelf or mount under it, with nine hooks total. Hangs mugs in the dead space between counter and cabinet.
- Watch out
- Check your cabinet shelf thickness and leave room for the brewer lid under the mugs.
- Price
- $ · Save
What we like
- Pro: Uses space nothing else uses
- Pro: Mugs on show, counter stays clear
Keep in mind
- Con: Tall mugs can hit the counter
- Con: Hooks swing when you grab a mug
Check Price on Amazon for Luckinow Under Cabinet Mug Hooks, 3 Pack (9 Hooks) (opens in a new tab)
Affiliate link · Price may change
Countertop mug tree
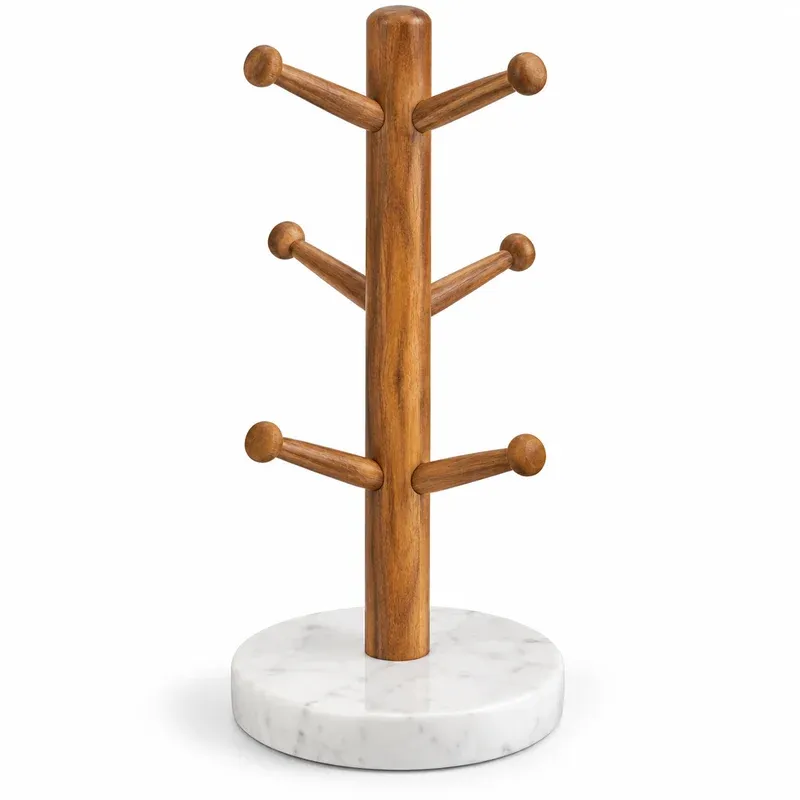
Buruis Acacia Wood Mug Tree with Marble Base, 6 Hooks
- Best for
- Showing off holiday mugs on a small counter
- Why it's here
- A countertop mug tree with an acacia wood post, six hooks and a white marble base. Hangs six holiday mugs in a footprint about 6 inches across.
- Watch out
- Six hooks only; very large or figural mugs may knock into each other.
- Price
- $ · Save
What we like
- Pro: Small footprint for a tight counter
- Pro: Heavy marble base with silicone pads
- Pro: Neutral enough to keep out all year
Keep in mind
- Con: Only six hooks
- Con: Wide-handled figural mugs can crowd each other
Check Price on Amazon for Buruis Acacia Wood Mug Tree with Marble Base, 6 Hooks (opens in a new tab)
Affiliate link · Price may change
Step 8: Add the prep zone
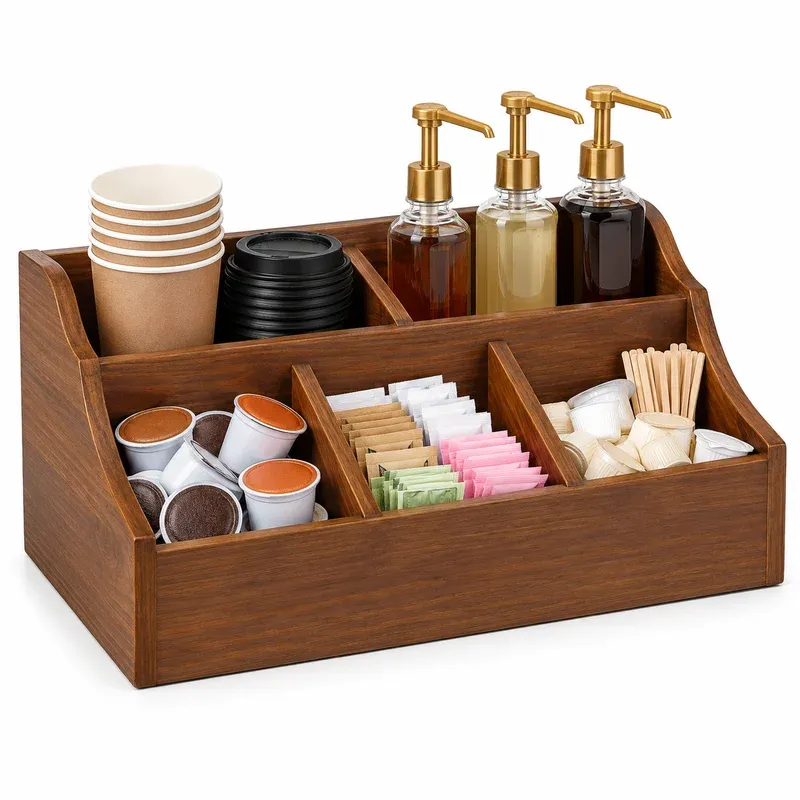
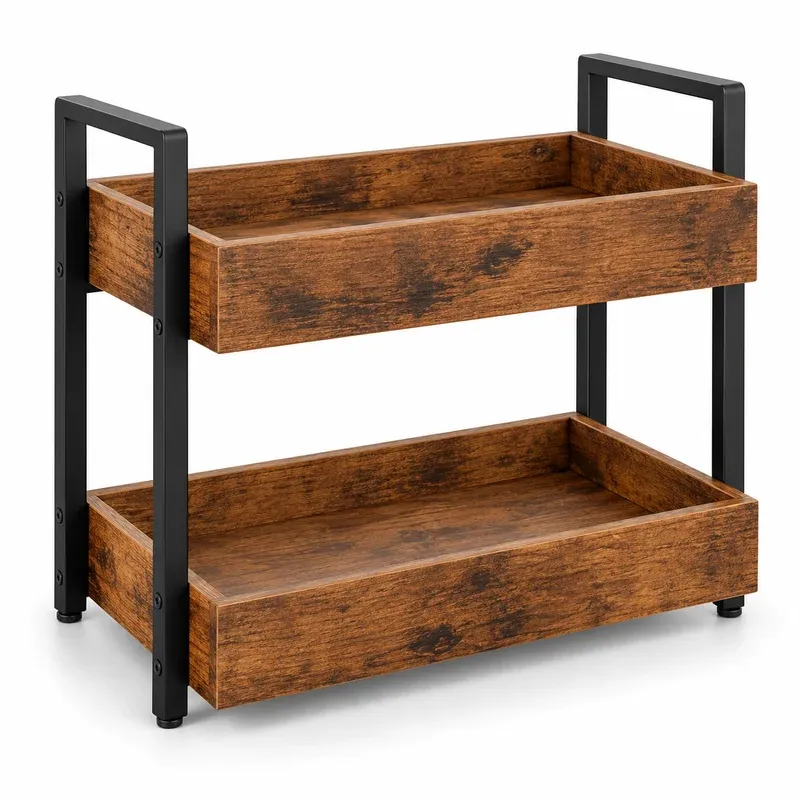
The prep zone holds what goes into the cup after brewing: syrups, sugar, spoons, stirrers and a frother. Corral them in one caddy so the zone has edges. A 2-tier riser doubles the space if the counter is narrow.
Prep caddy
WooOrganix Wooden Coffee Station Organizer with Adjustable Dividers
- Best for
- Pod and tea drinkers with loose packets all over the counter
- Why it's here
- Pine caddy with 5 compartments and adjustable dividers for K-Cups, tea bags, sugar packets, stirrers and a syrup bottle. One footprint instead of six loose boxes.
- Watch out
- The listing's spec table and bullets disagree on size; the bullets say 12.6 x 9.17 in. Measure your spot first.
- Price
- $ · Save
What we like
- Pro: Corrals pods, tea and packets in one tray
- Pro: Tiered back row keeps tall items visible
- Pro: Wipes clean with a damp cloth
Keep in mind
- Con: Takes about 9 in of counter depth
- Con: Size figures differ within the listing
Affiliate link · Price may change
Go vertical
KLM 2-Tier Wood and Metal Countertop Shelf (Coffee Station Organizer)
- Best for
- Narrow counters that need vertical storage without drilling
- Why it's here
- Two wood shelves on a powder-coated metal frame that double the surface beside a coffee maker. Good for mugs, syrups and canisters.
- Watch out
- 13.38 in tall: check it clears your upper cabinets, and keep it off the brewer's steam vent.
- Price
- $ · Save
What we like
- Pro: 7 in deep, so it leaves most of the counter free
- Pro: Freestanding, renter-friendly
- Pro: Holds syrup bottles on the top tier
Keep in mind
- Con: Needs assembly
- Con: Rustic brown finish only on this listing
Affiliate link · Price may change
Step 9: Set up storage above and below
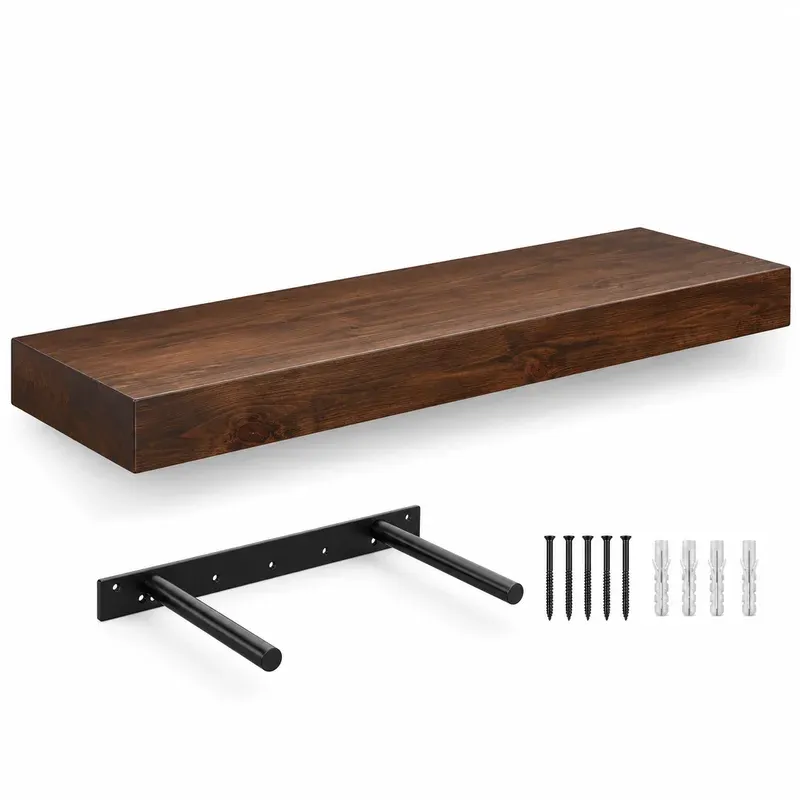
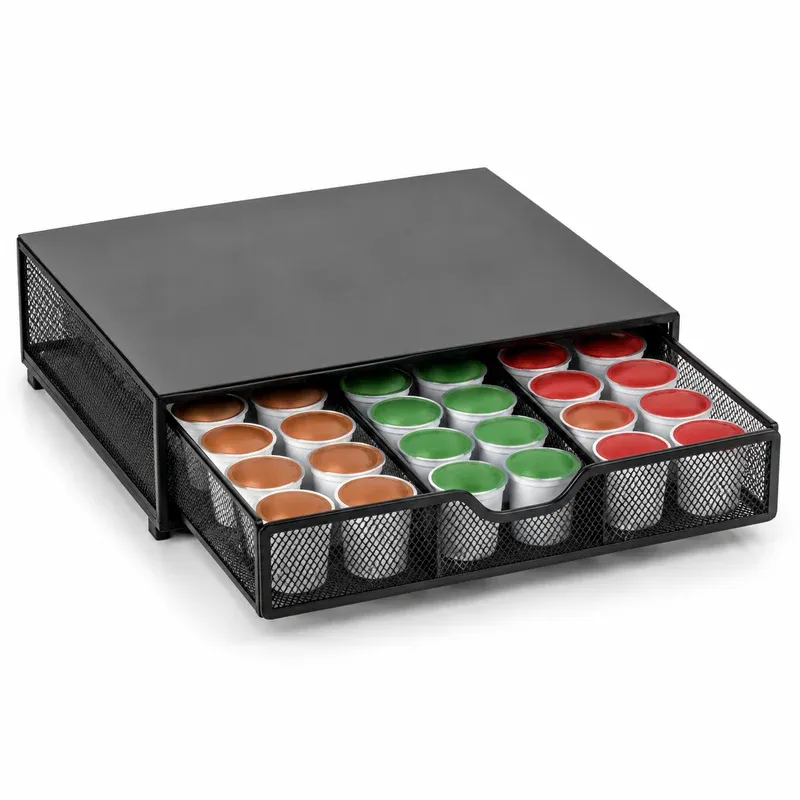
Daily items on the counter, everything else off it. Above: a floating shelf or the upper cabinet for mugs and canisters, at least 12 to 16 inches over the machine. Below: a drawer or cabinet for backstock beans, filters, pods and descaler. Under a pod brewer, a pod drawer turns the machine’s footprint into storage.
Shelf above
WELLAND Colin 10" Deep Floating Shelf, 36 Inch
- Best for
- Mug and canister storage over a coffee bar
- Why it's here
- A 36-inch rustic wood floating shelf that is 10 inches deep, enough for a row of mugs, canisters and a small plant above a coffee maker.
- Watch out
- Mount into studs and keep it 12 to 16 inches above the machine so the lid can open.
- Price
- $$ · Mid
What we like
- Pro: 10 in deep fits mugs two rows deep
- Pro: Hidden bracket looks clean
- Pro: Long enough for a whole coffee wall
Keep in mind
- Con: Needs drilling, so not for every rental
- Con: Thick shelf adds visual weight in a tiny nook
Check Price on Amazon for WELLAND Colin 10" Deep Floating Shelf, 36 Inch (opens in a new tab)
Affiliate link · Price may change
Storage under the brewer
Mind Reader Coffee Pod Drawer, 36 Pods, Metal
- Best for
- K-Cup households with boxes of pods on the counter
- Why it's here
- Metal 3-drawer base that holds 36 single-serve pods and slides under a pod brewer, so the pods take no extra counter space.
- Watch out
- Adds 3 in under the brewer. Check the brewer plus drawer still clears your upper cabinets with the lid open.
- Price
- $ · Save
What we like
- Pro: Zero extra footprint
- Pro: Dividers sort flavors
- Pro: No assembly
Keep in mind
- Con: Lifts the brewer 3 in
- Con: Fits K-Cup size pods, not Vertuo
Check Price on Amazon for Mind Reader Coffee Pod Drawer, 36 Pods, Metal (opens in a new tab)
Affiliate link · Price may change
Keep beans in an opaque, airtight canister, and label everything that gets refilled.
Bean storage
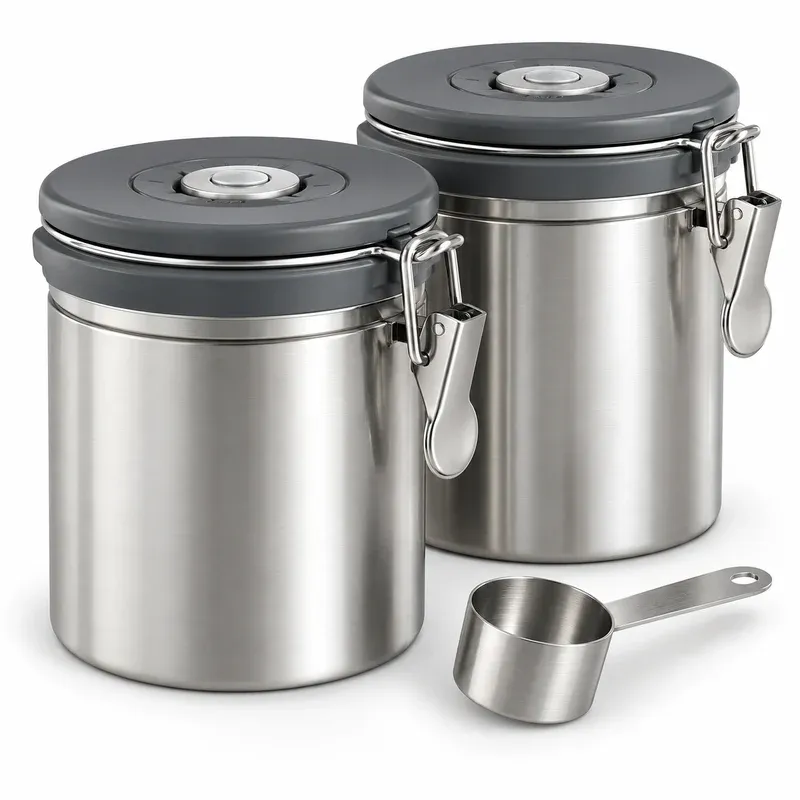
Coffee Gator Stainless Steel Coffee Canister, 22 oz, 2-Pack
- Best for
- Coffee bars that store beans and grounds side by side
- Why it's here
- Two opaque steel canisters with a one-way CO2 valve, a date tracker on the lid and a scoop. One for beans, one for decaf or ground coffee.
- Watch out
- Check the listing for size; Coffee Gator sells several capacities under similar names.
- Price
- $$ · Mid
What we like
- Pro: Opaque and airtight, as the NCA recommends
- Pro: Date wheel tracks when they opened the bag
- Pro: Matching pair looks tidy
Keep in mind
- Con: Takes counter space for two
- Con: Valve lid is not fully vacuum like Atmos
Affiliate link · Price may change
Step 10: Add light and decor last
Decor goes on last because it has to fit around everything else. Stick-on lights under the upper cabinets make the corner usable before sunrise; a sign, a plant or one framed print finishes it. Two or three decor pieces is plenty on a working counter.
Light the corner
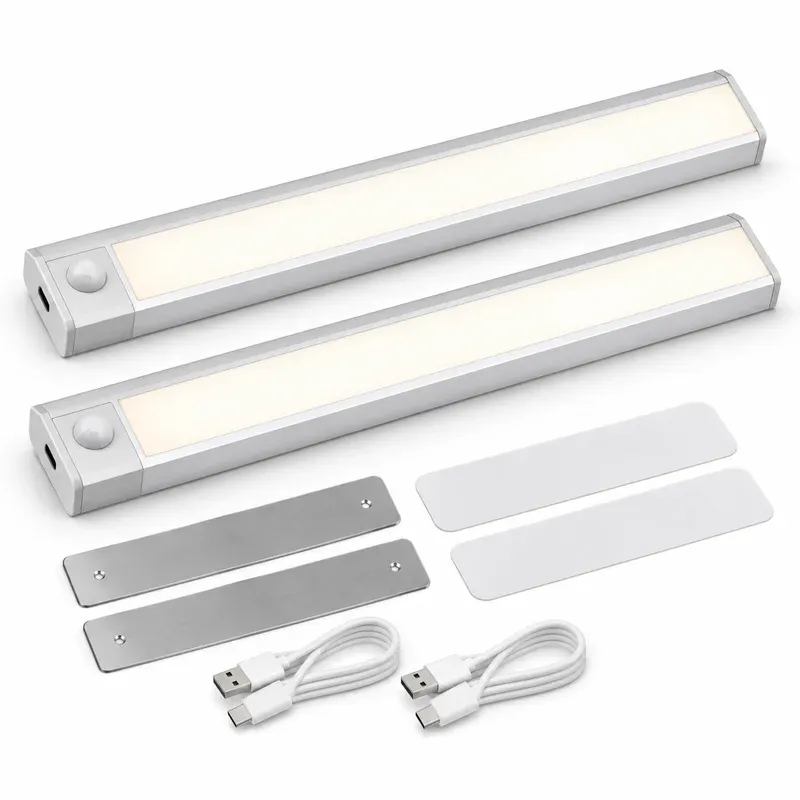
MCGOR 10" Rechargeable Under Cabinet Lights, 2 Pack
- Best for
- Lighting a coffee corner under upper cabinets
- Why it's here
- Two 10-inch LED bars that charge by USB and stick on with a magnetic strip. Motion sensor and five brightness levels, so no hardwiring is needed over a coffee bar.
- Watch out
- Battery lights need recharging; plan on taking them down every few weeks.
- Price
- $ · Save
What we like
- Pro: No wiring, renter-friendly
- Pro: Motion sensor for early mornings
- Pro: Dimmable
Keep in mind
- Con: Recharging is a chore
- Con: Cool-toned light can look harsh on wood
Check Price on Amazon for MCGOR 10" Rechargeable Under Cabinet Lights, 2 Pack (opens in a new tab)
Affiliate link · Price may change
The order to buy things in
The table below lists the buying order I’d follow, with the reason for each spot in line.
| Order | Buy | Why it comes here |
|---|---|---|
| 1 | Tape measure (if you don't own one) | Every later purchase depends on the 5 numbers |
| 2 | The brewer or espresso machine | It sets the brew zone's width, depth and clearance |
| 3 | Mat and cord organizers | Protect the counter and tidy power on day one |
| 4 | Mug storage | Sized to the space left beside the machine |
| 5 | Prep caddy, syrups and canisters | Fill the space that's actually left |
| 6 | Shelves, hooks or a cabinet | Only once you know what overflows |
| 7 | Lights and decor | Placed around everything else |
Coffee bar layout and zones (brew, prep, mug, storage)
The best coffee bar layout is the four zones in a line, in the order you use them: grab a mug, brew, add milk or syrup, set it down. Storage sits above or below so the counter only holds what you use every day.
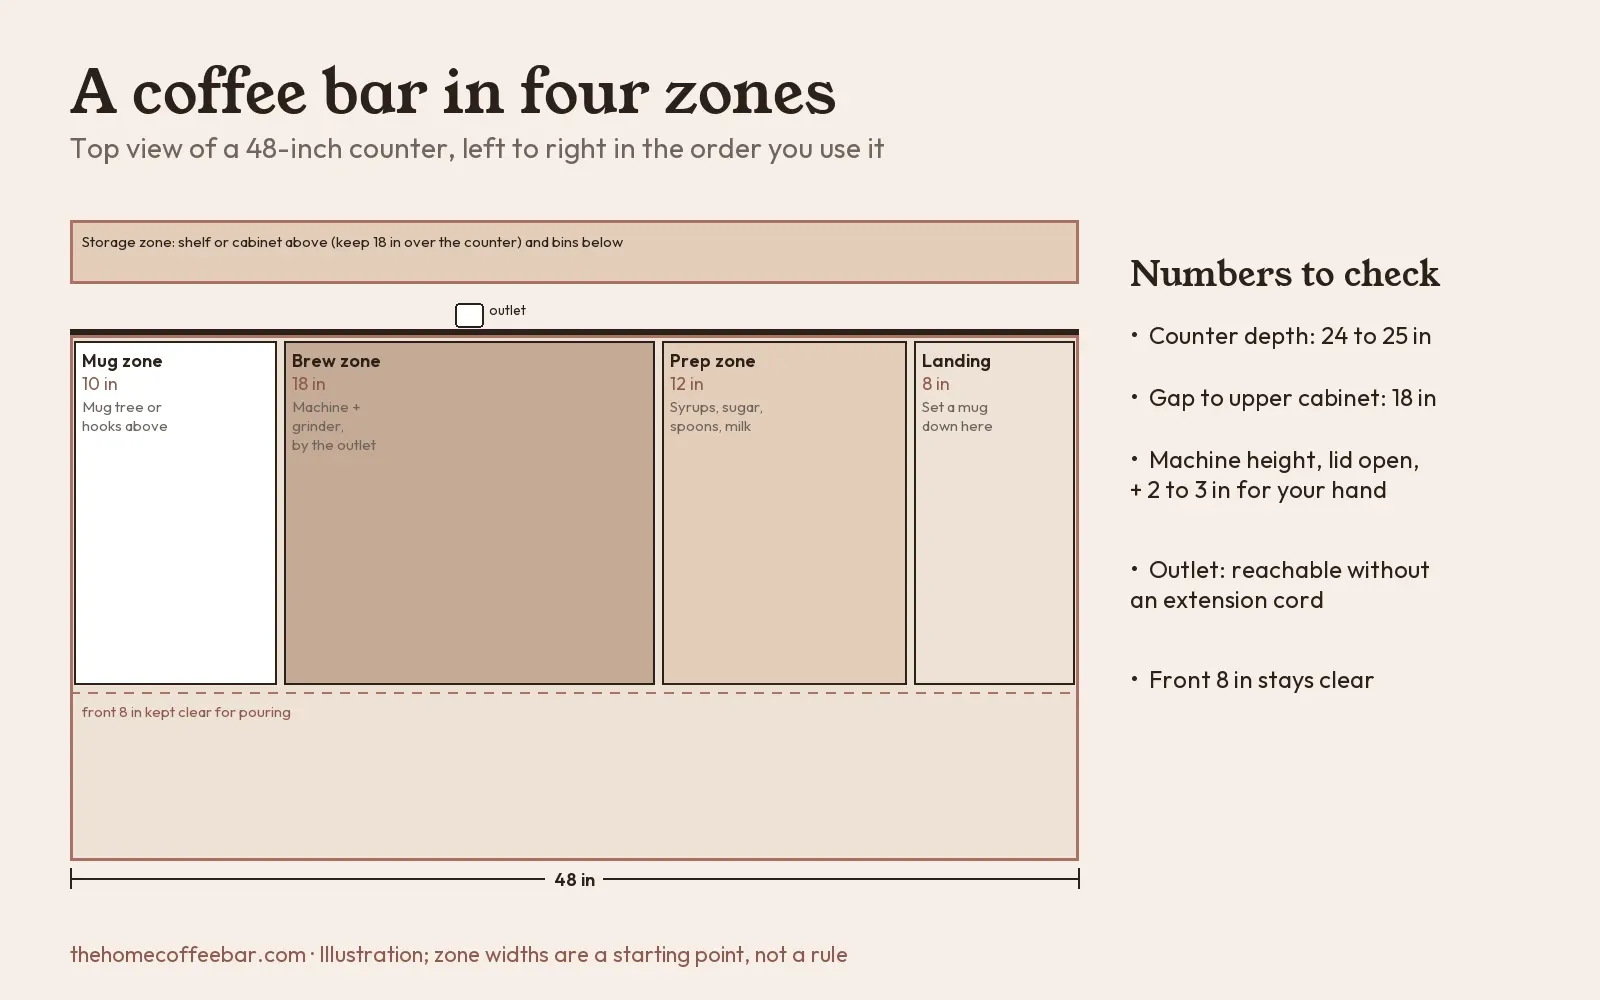
Flip the order left to right to suit your hand or the outlet position. Two rules hold either way:
- The brew zone sits in front of the outlet, so the cord never crosses the counter.
- The front 8 inches stay clear, so there’s always room to pour.
The zone widths change with the counter. The table below gives starting points for the 3 common widths.
| Counter width | Mug zone | Brew zone | Prep zone | Fits |
|---|---|---|---|---|
| 24 in | Mug tree, 6 in | Pod brewer on a pod drawer, 13 in | One jar, 4 to 5 in | Pod or capsule setups |
| 36 in | Hooks above, 0 in on the counter | Drip brewer + grinder, 20 in | Riser or tray, 13 in | Drip and pour-over |
| 48 in | Mug tree, 6 to 10 in | Espresso + grinder + knock box, 20 to 26 in | Syrup riser, 13 in | Espresso with milk drinks |
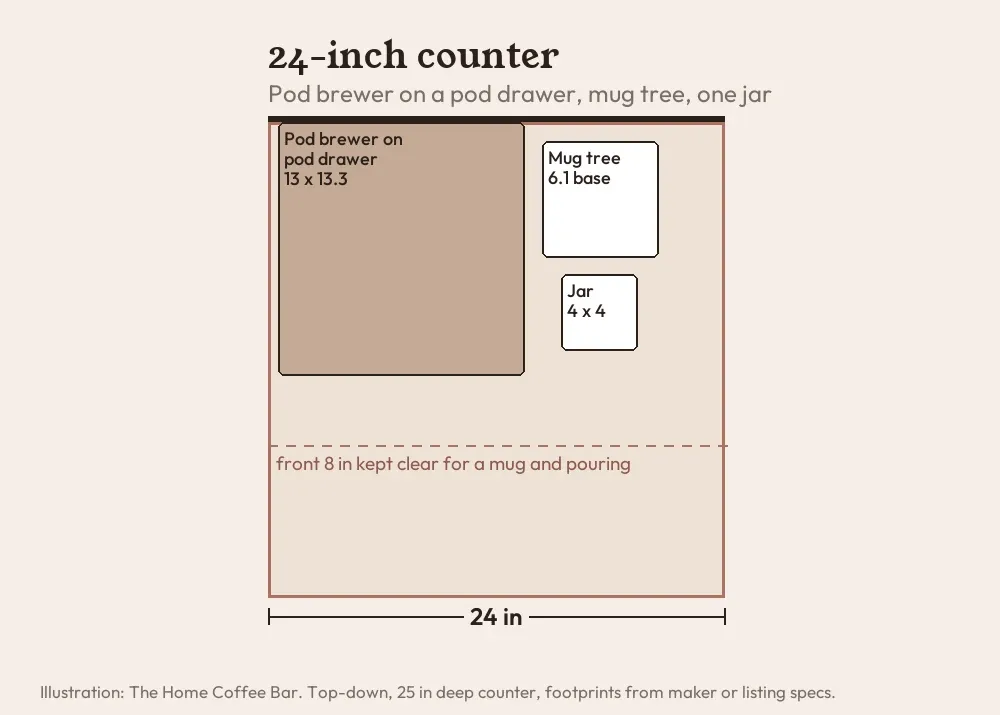
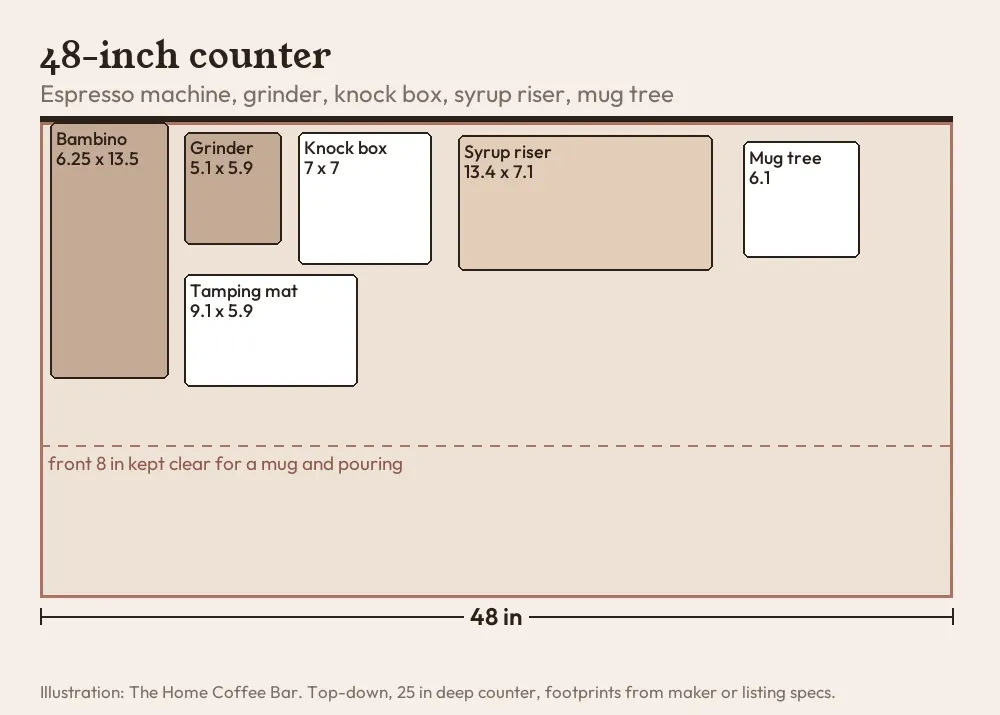
The full set of scale drawings, including 36 inches, is in our countertop coffee station guide.
Setting up a coffee station on the kitchen counter
On a kitchen counter, the coffee station works best at the end of a run, near the sink and away from the stove. The end of a run means one side is open for a mug tree or a cart; near the sink means short trips for water; away from the stove keeps grease off mugs.
- Under upper cabinets: check the machine’s lid-open height against the 18-inch gap.
- In a corner: put a lazy Susan in the back where your arm can’t reach.
- On an island: islands have their own outlet rules; check you have one on the island before planning a machine there.
For corners
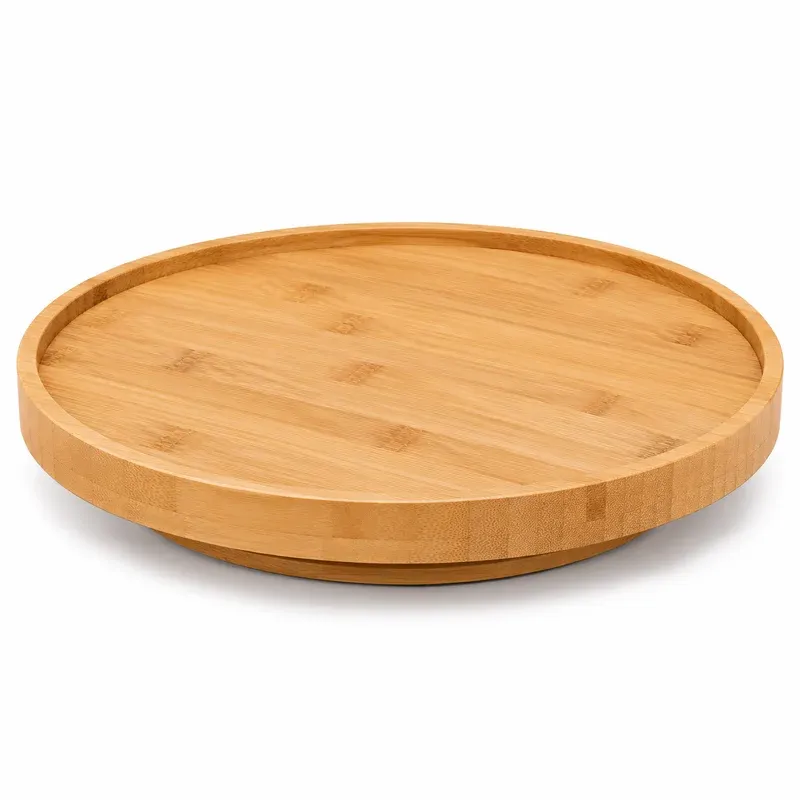
10 Inch Bamboo Lazy Susan Turntable, Non-Skid
- Best for
- Corner coffee stations where the back is hard to reach
- Why it's here
- A 10-inch bamboo turntable with a non-skid base. Put syrups, sugar and a creamer jar on it and spin to reach the back row in a deep corner.
- Watch out
- Measure the corner first; a 10-inch circle needs about 10 inches of clear depth.
- Price
- $ · Save
What we like
- Pro: Nothing gets lost in the corner
- Pro: Easy to wipe
Keep in mind
- Con: Round shape wastes some space
- Con: Tall bottles can tip when you spin fast
Check Price on Amazon for 10 Inch Bamboo Lazy Susan Turntable, Non-Skid (opens in a new tab)
Affiliate link · Price may change
Coffee bar design ideas and styles
Design comes after function: pick one material, one color and one hero piece, and let the machine and the mugs do the rest. These 6 ideas show the main styles with what makes each one work.
1. Open shelves over an espresso counter
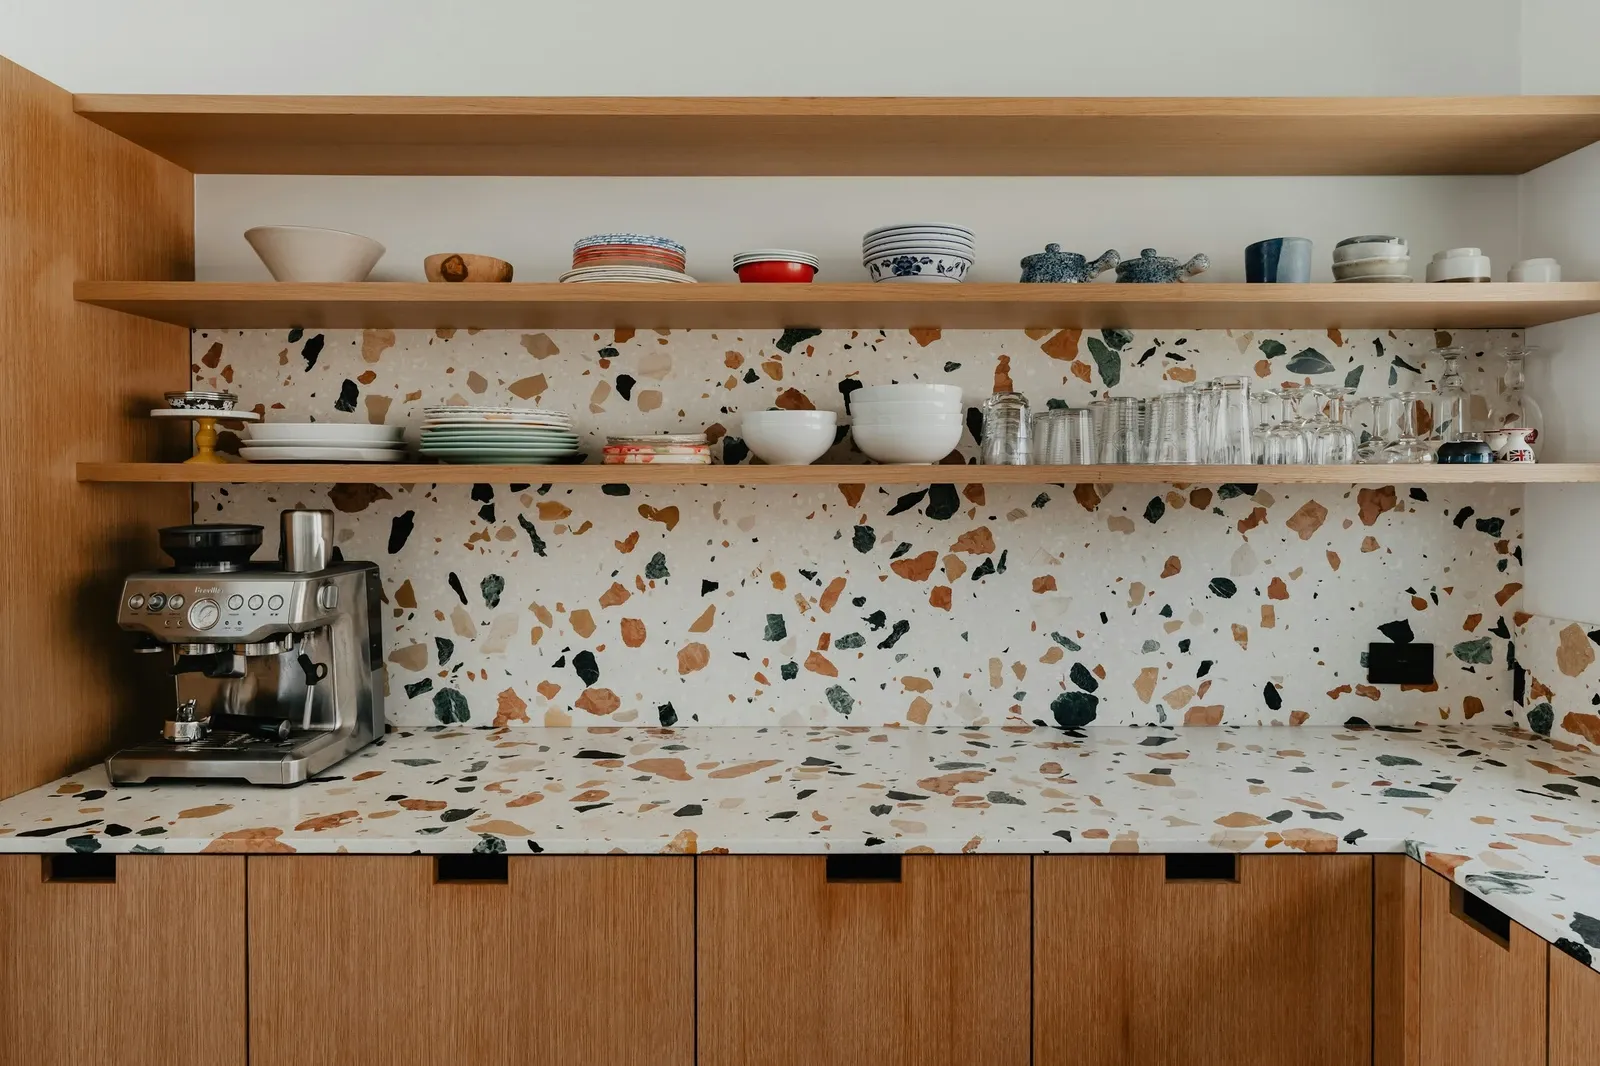
Long wood shelves turn plain wall into the storage zone. Keep cups and glasses on the lowest shelf and everything decorative higher up.
2. A small cabinet as a whole coffee bar
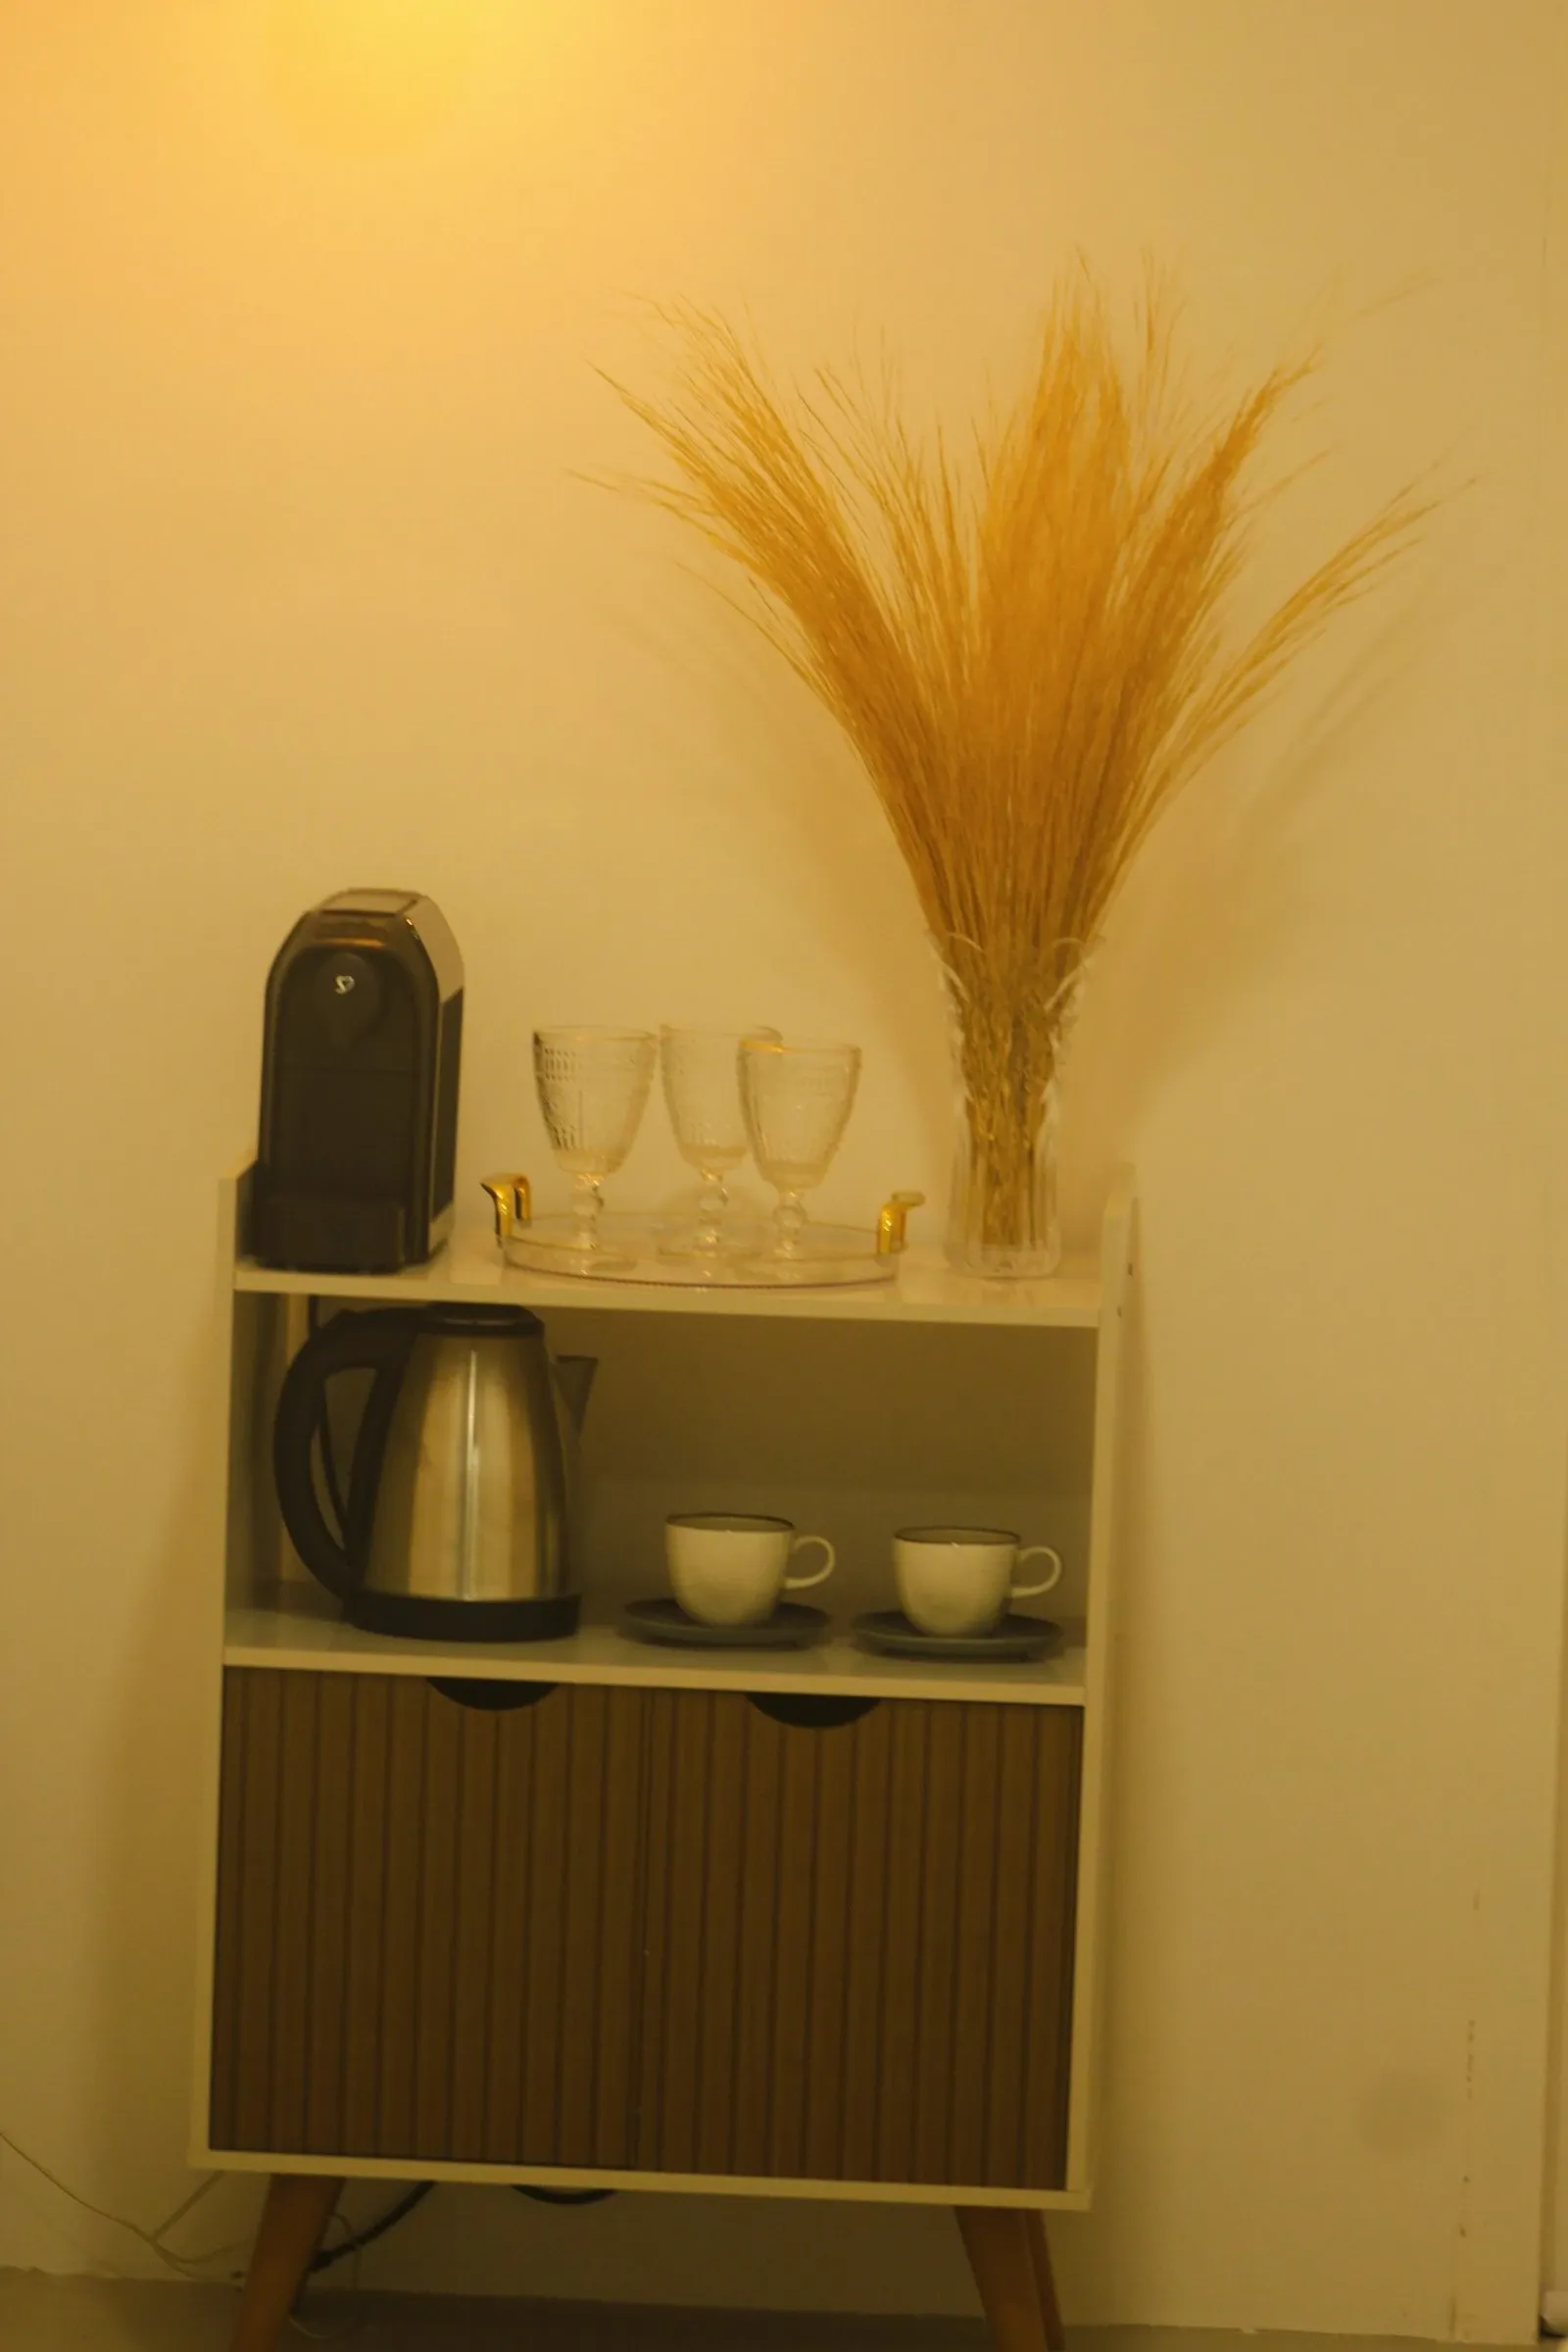
A 30-inch cabinet gives you a counter on top and storage behind a door, anywhere there’s an outlet. Our coffee bar cabinet guide covers sizes and clearances.
3. A rolling cart that moves to the outlet
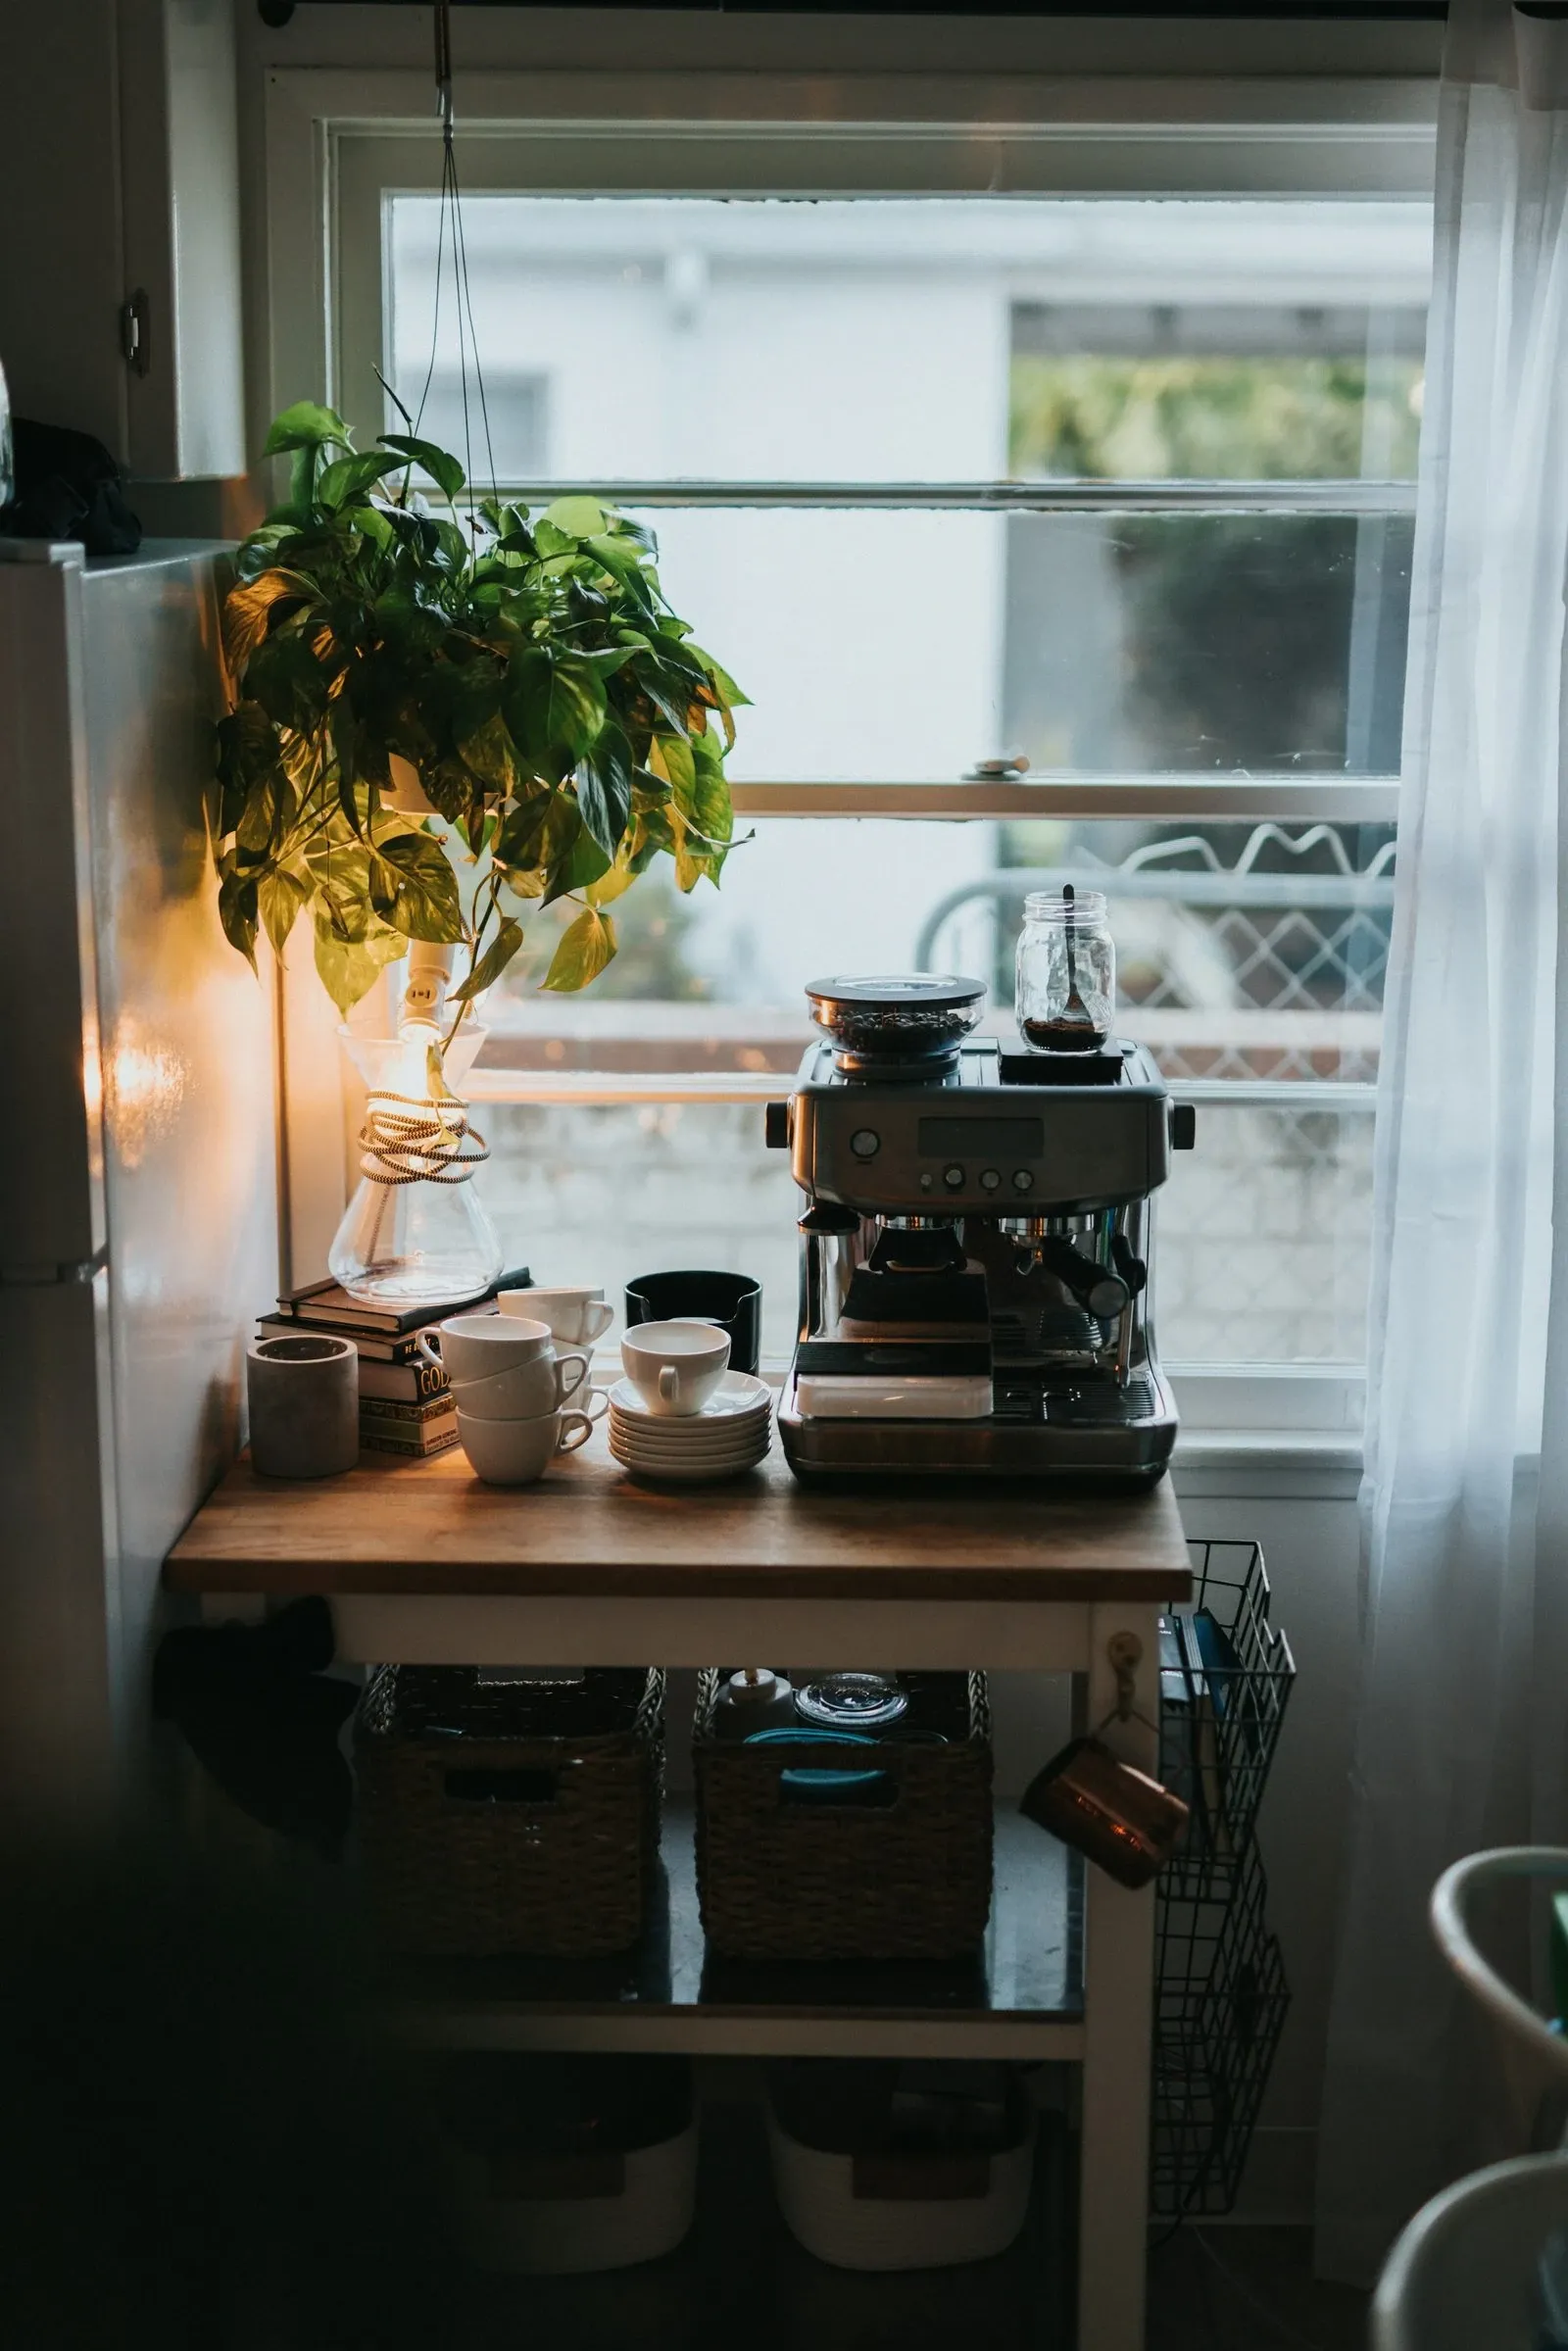
A cart parks where the outlet is and rolls away for cleaning. Lock the wheels before you brew. See our coffee bar cart guide for carts that hold a machine.
4. A pegboard wall for pour-over gear
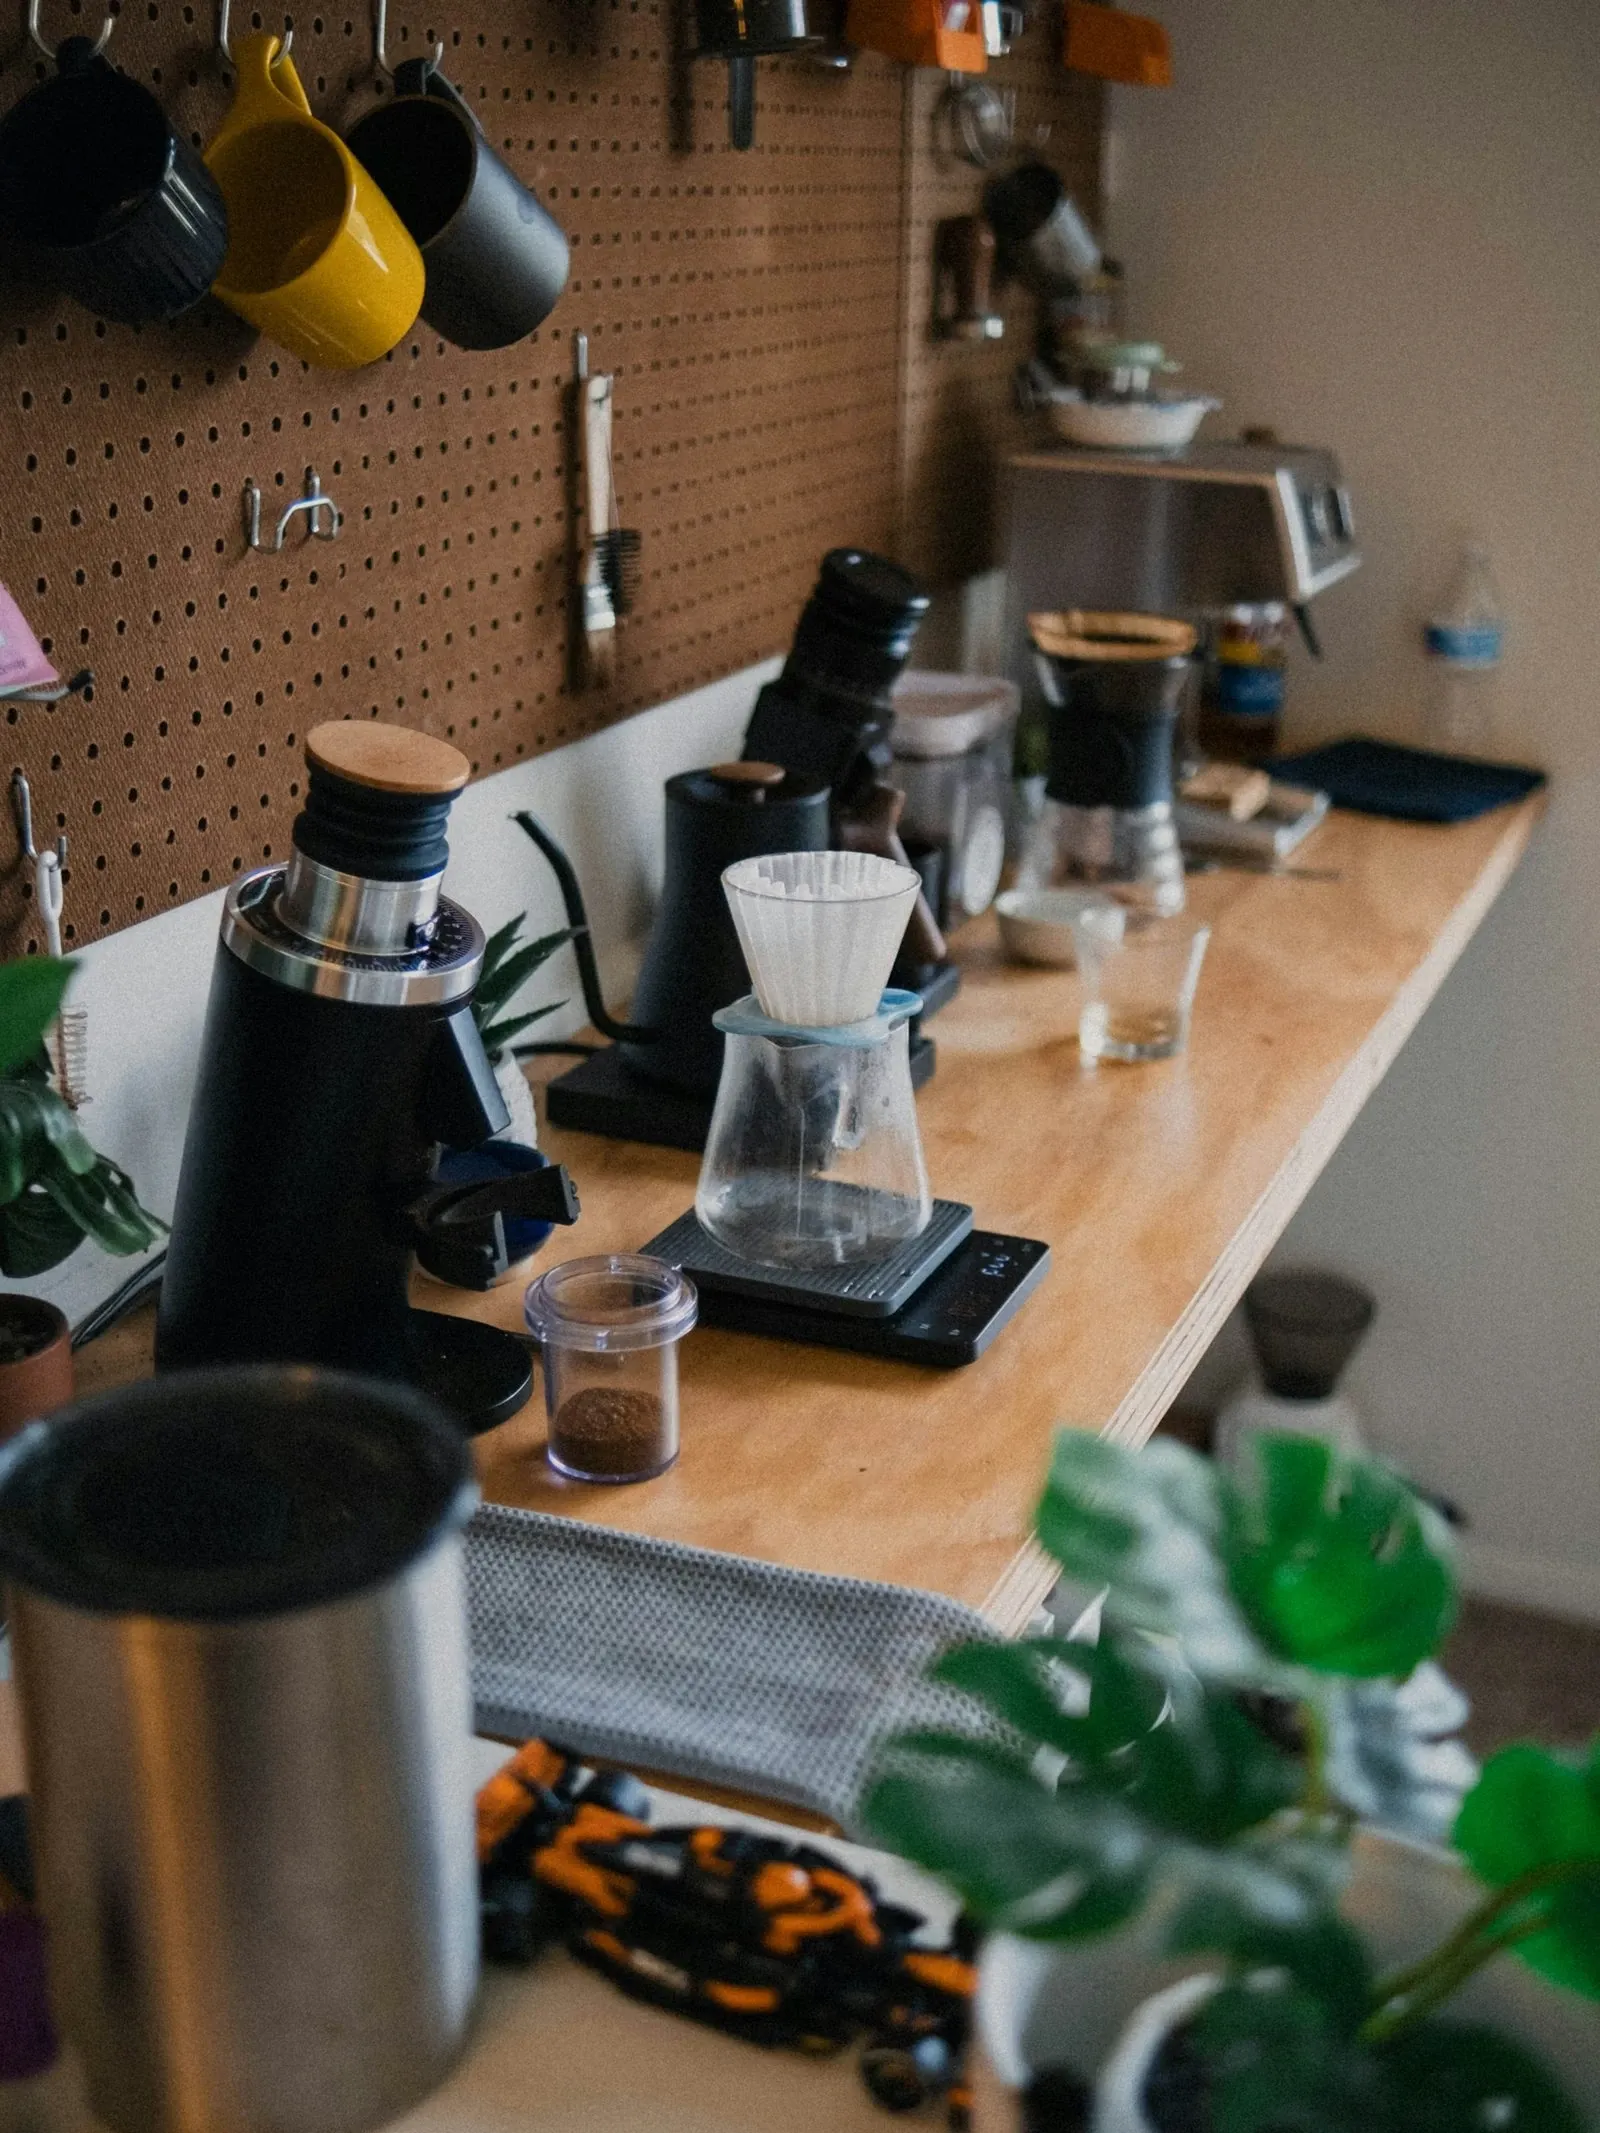
A pegboard keeps the counter almost empty. Drippers, a scale, towels and mugs all hang, and you can move them around in seconds.
5. A minimalist concrete cube for pour-over
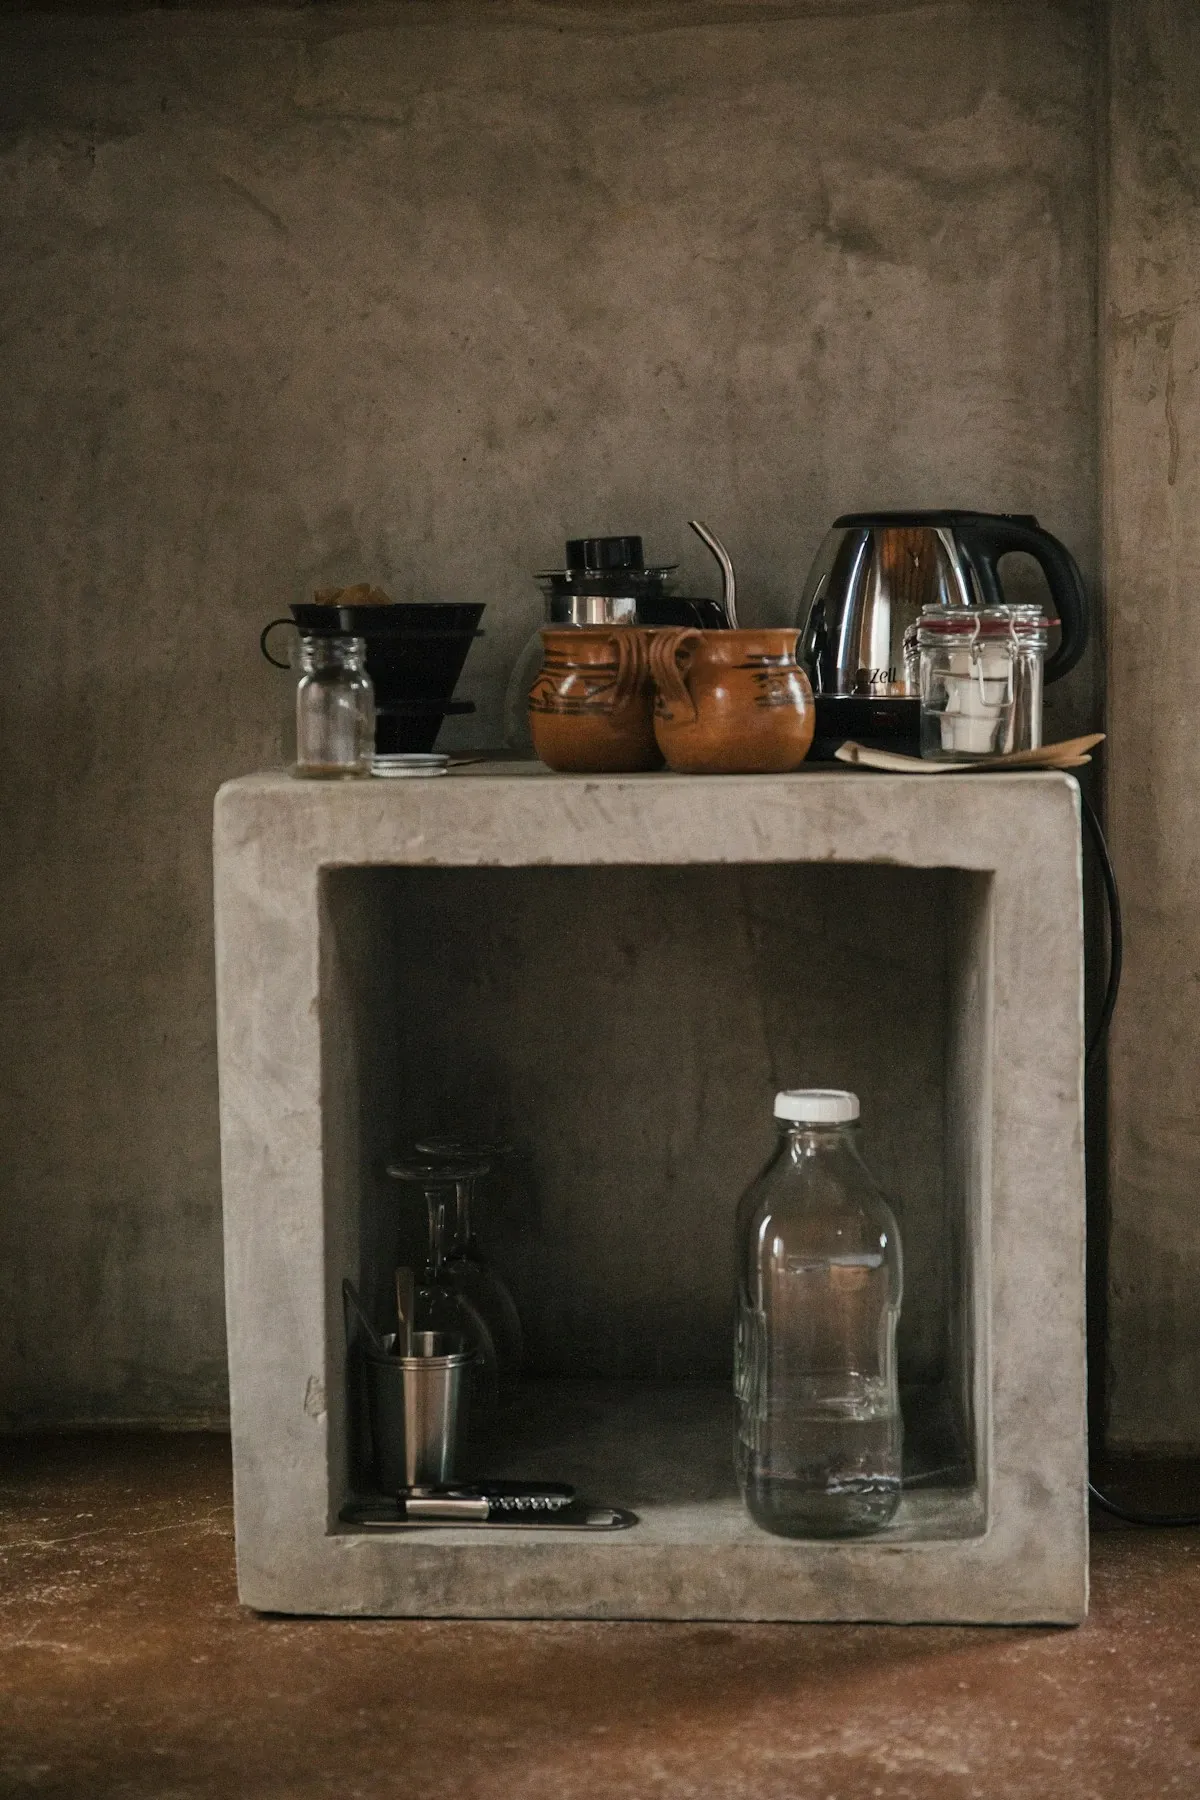
One block, one kettle, one dripper and two mugs. Minimal setups work when the open space below holds the backstock, here a bottle of water and spare glasses.
6. A glam station with fresh flowers
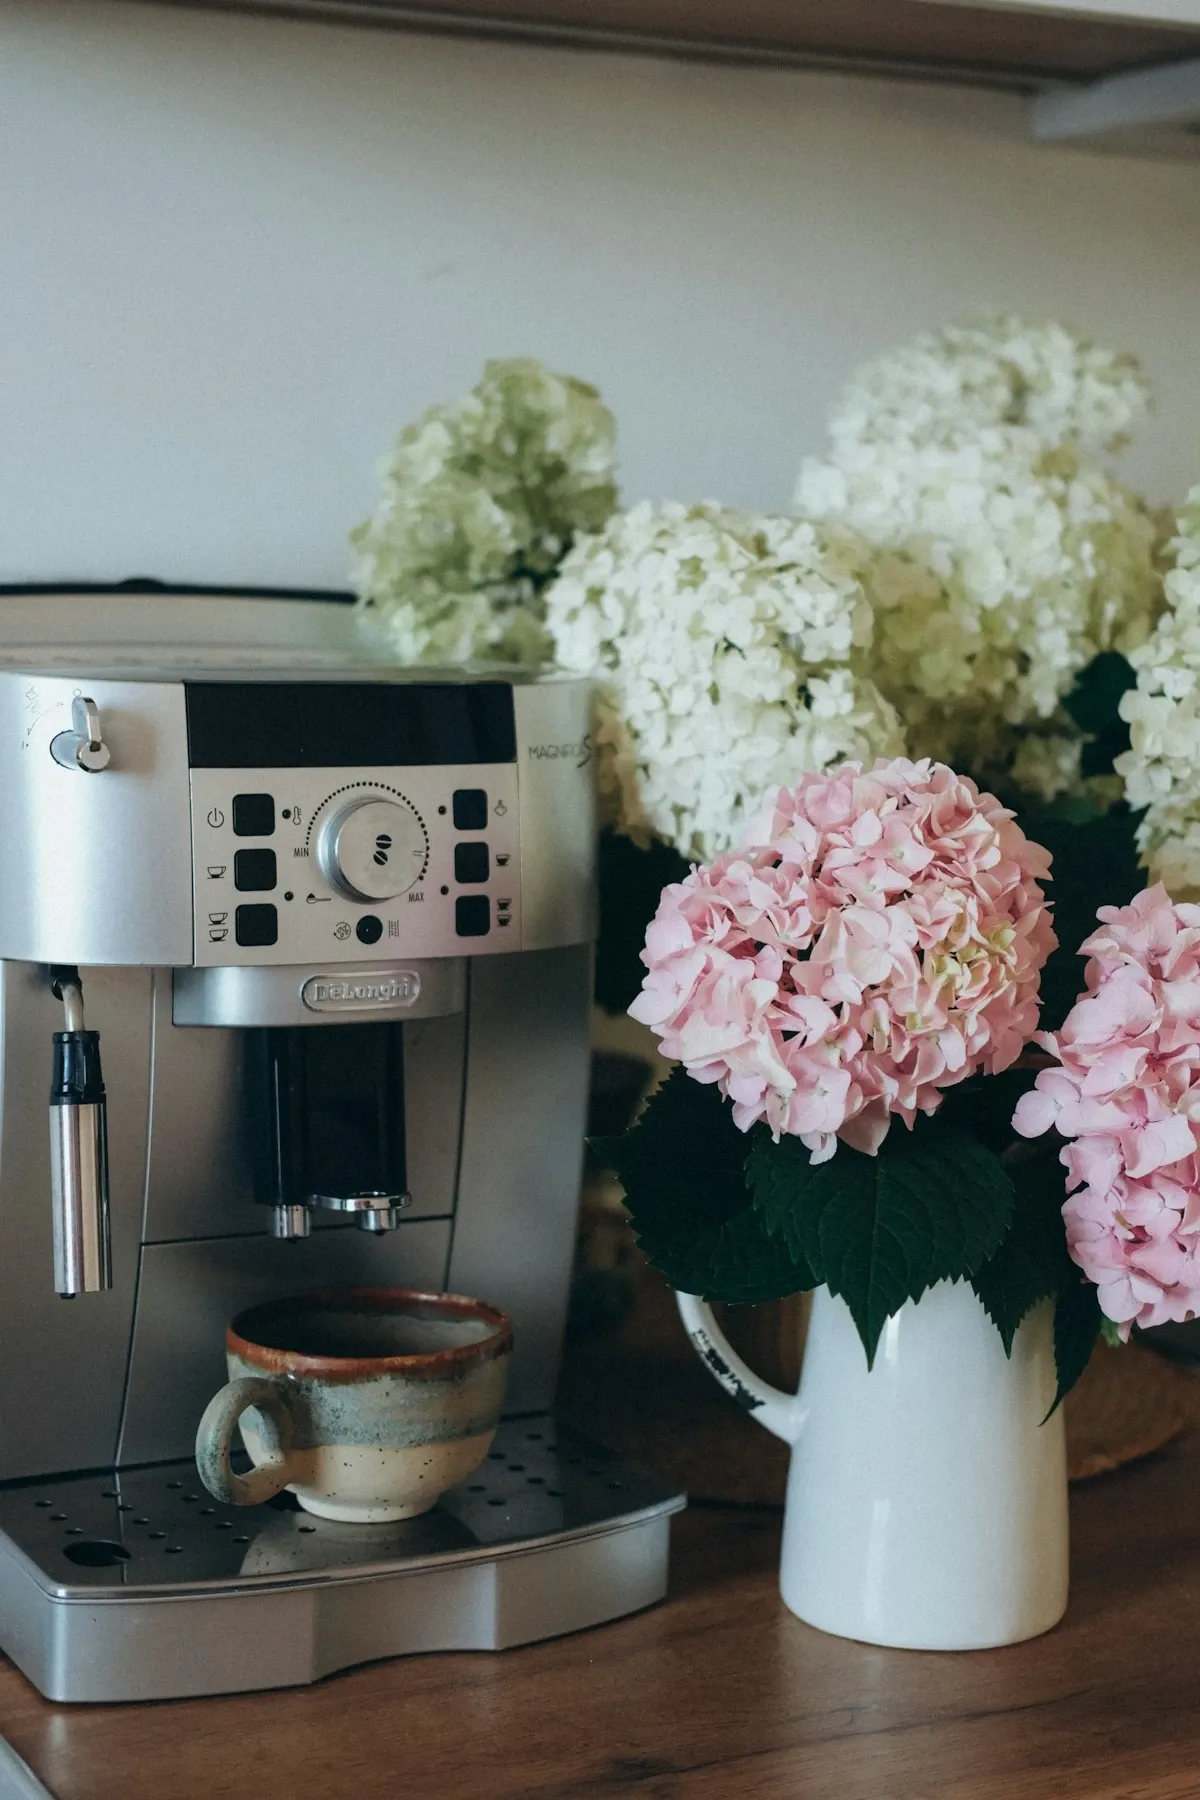
A chrome machine and a big vase of flowers is all the decor this look needs. Keep the vase on the prep side, away from the steam wand.
Want more styles? Browse our coffee bar ideas and see coffee bar shelves for wall setups.
Setting up a coffee bar in a small space, nook or corner
A small coffee bar needs one machine, vertical storage and nothing on the counter that doesn’t get used daily. Twenty-four inches is enough for a pod brewer, a mug tree and a jar.
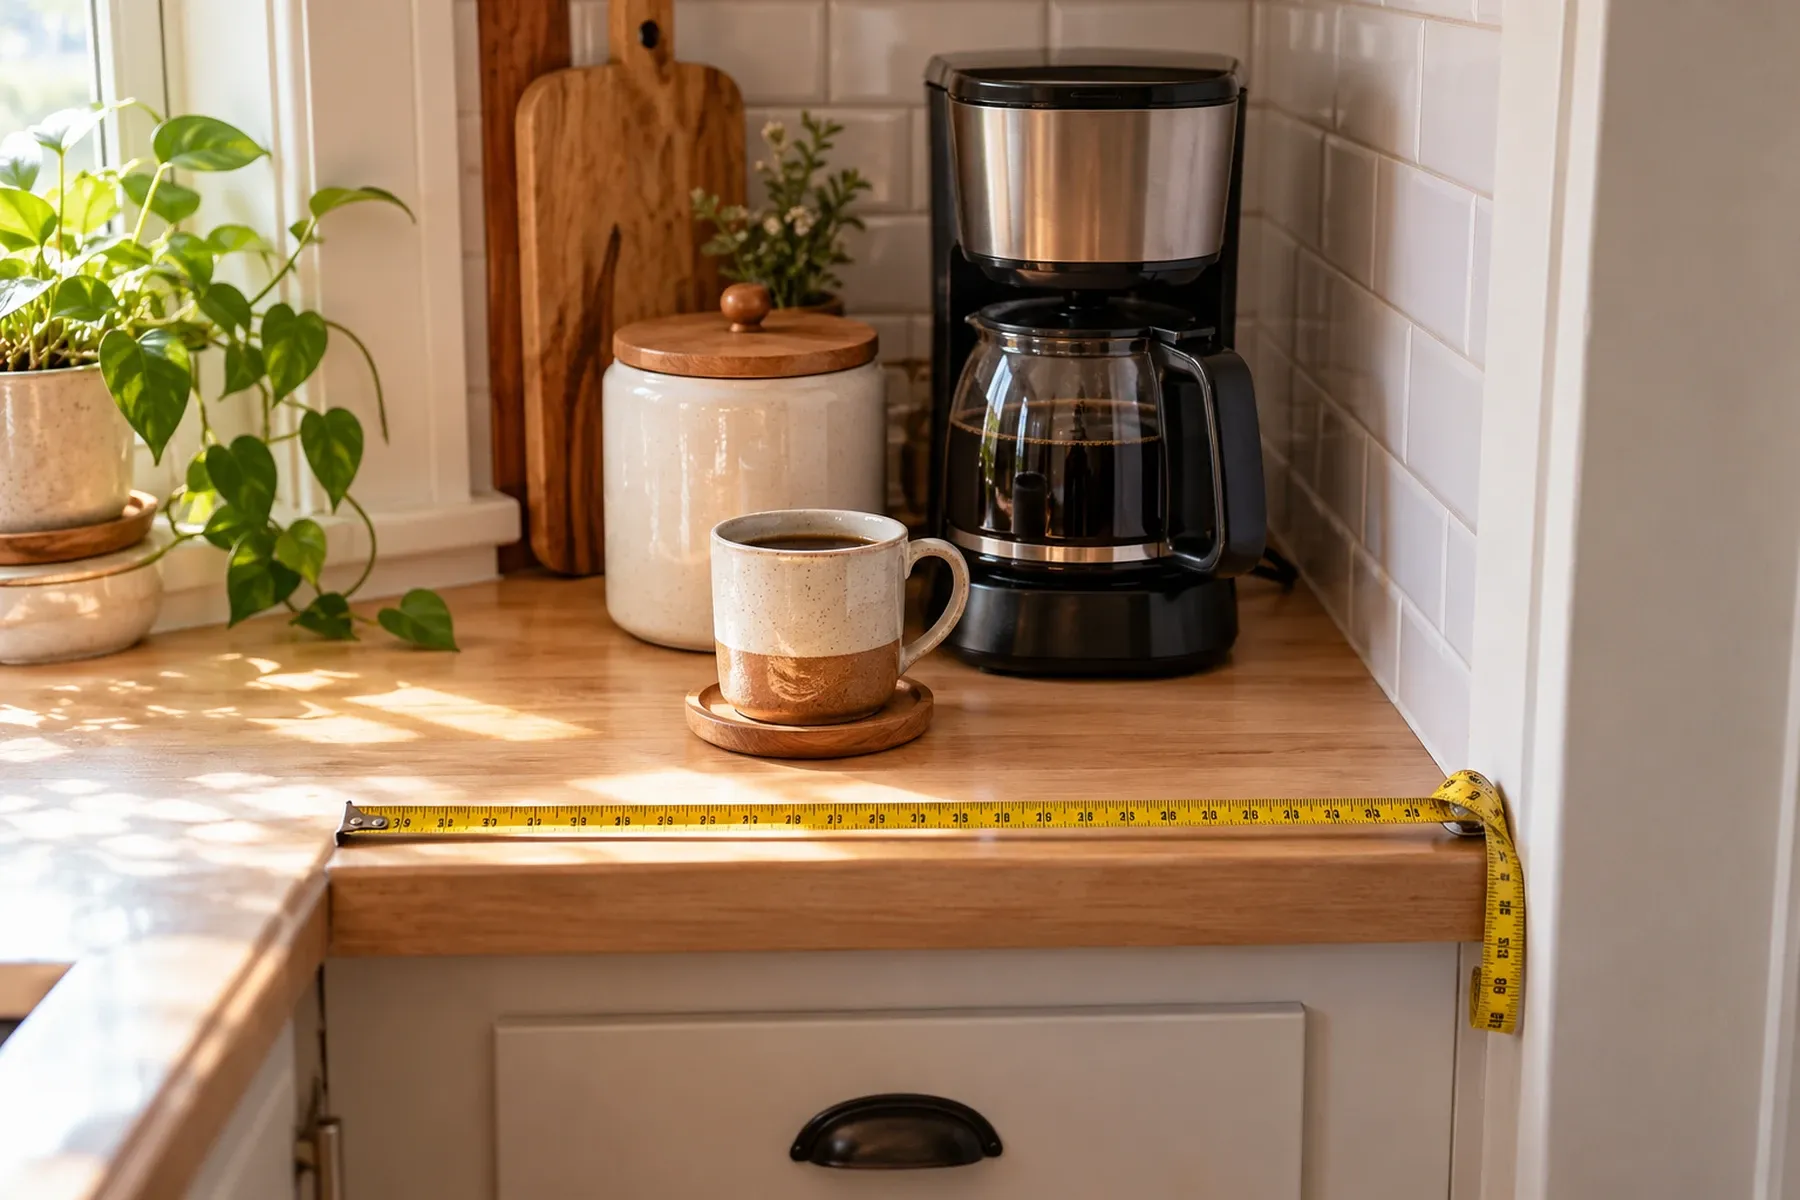
- 24-inch counter: pod brewer on a pod drawer, mug tree, one canister. Everything else in a cabinet.
- Corner: machine on one wall, mugs on the other, lazy Susan in the back.
- Nook or closet: a cabinet or shelf unit with the machine on a pull-out shelf; run it with the door open so steam escapes.
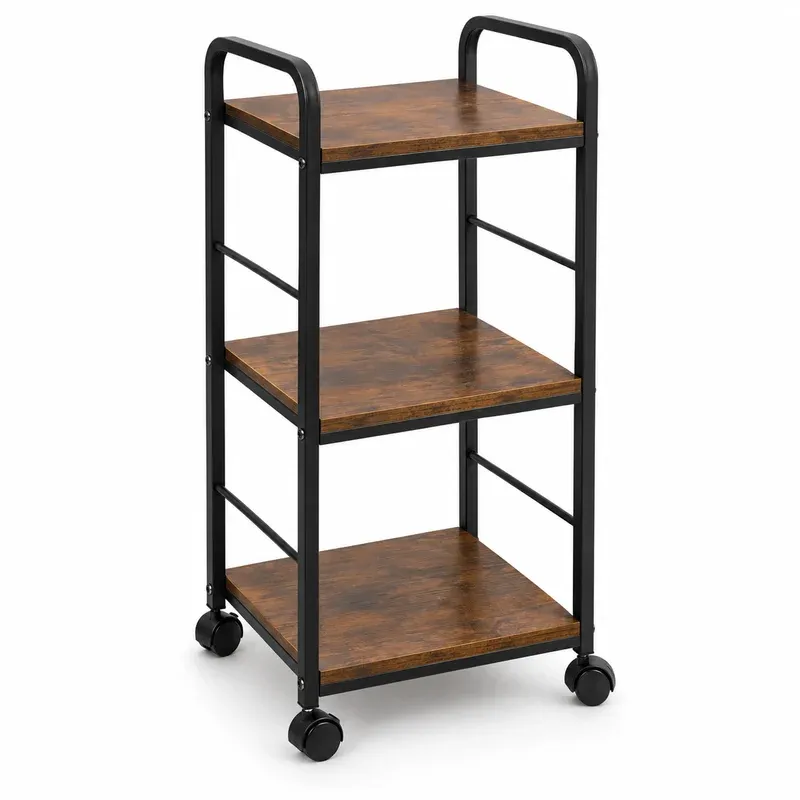
- Cart: a 3-tier cart holds the machine on top, mugs in the middle, backstock below.
Small-space cart
Mind Reader 3-Tier Rolling Cart, Wood and Metal
- Best for
- Renters and small kitchens that need a coffee bar on wheels
- Why it's here
- A three-shelf rolling cart with a metal frame and wood-look MDF shelves. Machine on top, mugs in the middle, backstock on the bottom shelf.
- Watch out
- Only two of the four casters lock, so park it against a wall if your machine is heavy.
- Price
- $ · Save
What we like
- Pro: Moves to wherever the outlet is
- Pro: No drilling, no install
- Pro: Cheap enough to try the idea first
Keep in mind
- Con: Small top for a full-size espresso machine
- Con: MDF shelves don't like standing water
Check Price on Amazon for Mind Reader 3-Tier Rolling Cart, Wood and Metal (opens in a new tab)
Affiliate link · Price may change
No-drill fixes for renters
Renters can set up a full coffee bar without a single hole:
- Mug tree or slide-on under-shelf hooks instead of a wall rack.
- A 2-tier riser instead of a floating shelf.
- Stick-on rechargeable lights instead of wired under-cabinet lighting.
- Adhesive cord organizers instead of screwed-in cable clips.
- Peel-and-stick tile on a board behind the bar, propped rather than glued.
A mini fridge for milk and cold brew is the one upgrade that needs careful planning in a small space, because fridges need clearance to breathe. Our coffee bar mini fridge guide covers it.
How to organize your coffee station after setup
A coffee station stays organized when every item has one spot and refills go back to the same spot. Three habits do most of the work.
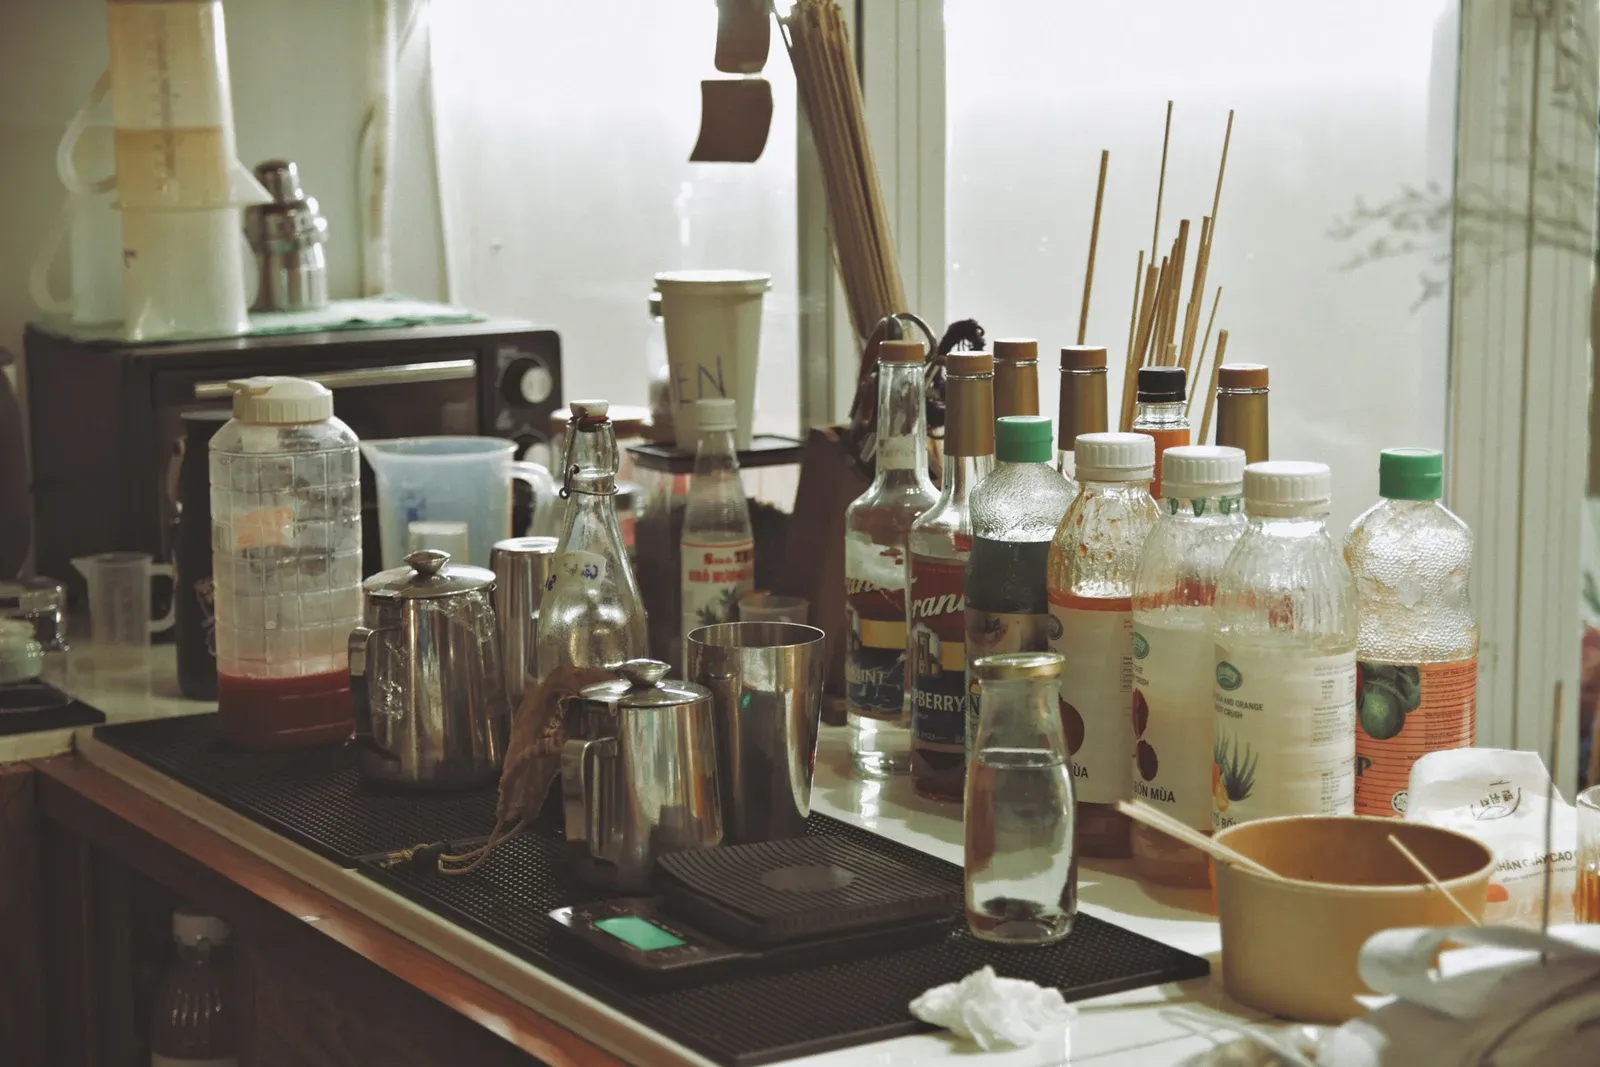
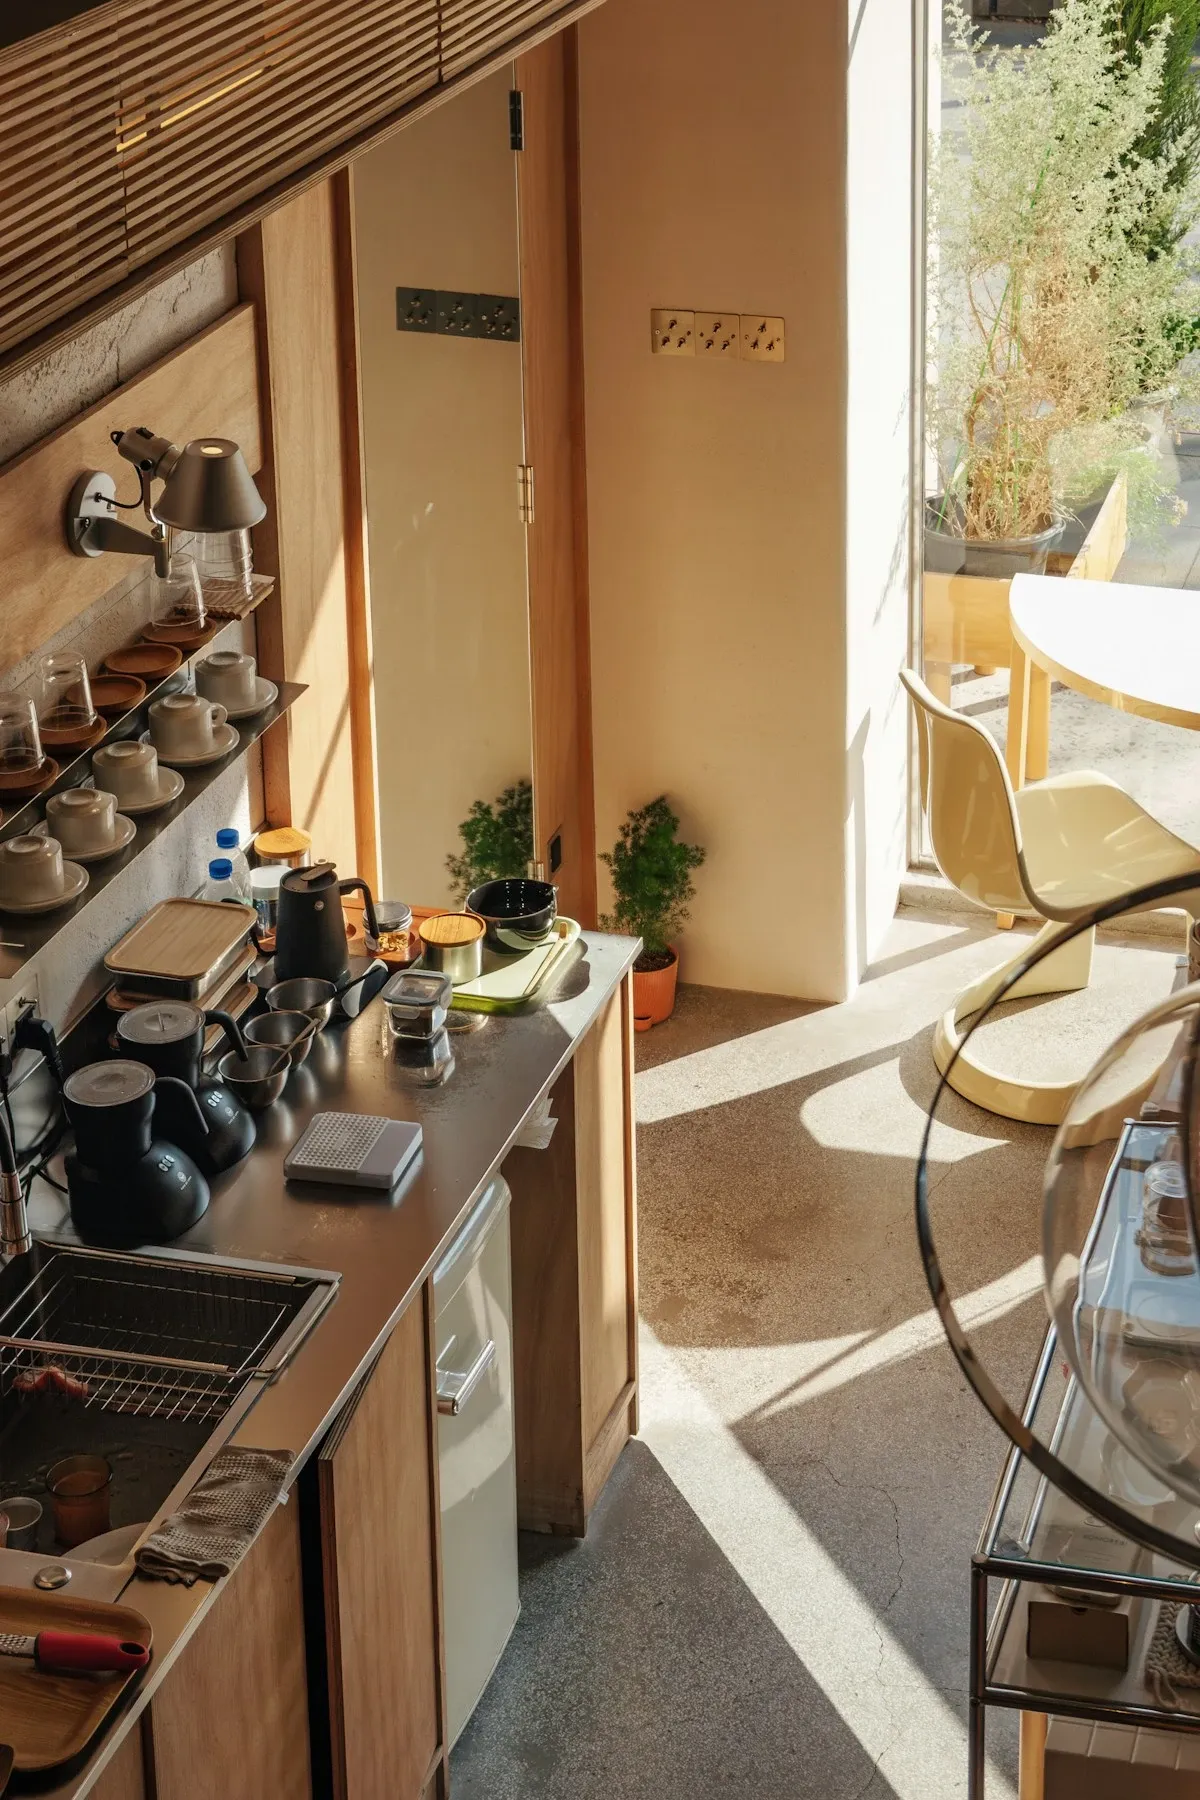
- Label refills. Beans, sugar, pods and syrups get a label with the contents and the date opened. Our coffee bar labels guide has printable sets.
- Reset once a week. Wipe the mat, empty the drip tray, refill the caddy, move anything that crept onto the counter back to storage.
- Edit monthly. Anything you didn’t touch for a month goes into a cabinet or out of the house.
Reusable labels
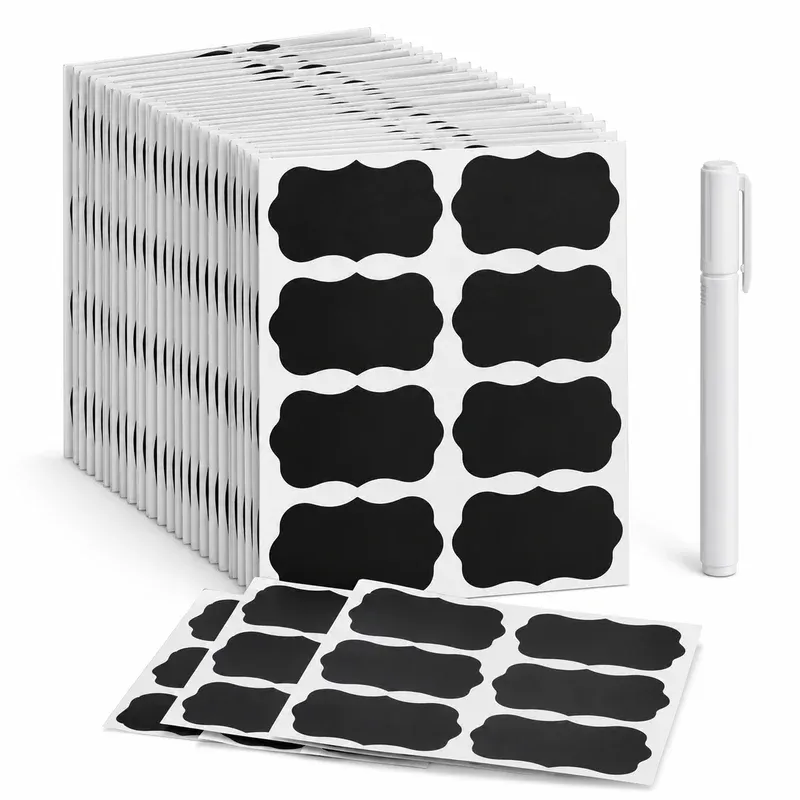
ONUPGO Chalkboard Labels, 180 Pieces with Liquid Chalk Marker
- Best for
- Jars and bottles whose contents rotate with the seasons
- Why it's here
- Reusable black vinyl labels (2 x 2.95 in) and a white chalk marker. Write the flavor and date, wipe it off and rewrite when the jar changes.
- Watch out
- Liquid chalk smudges under wet fingers; keep it off the pump side of the bottle.
- Price
- $ · Save
What we like
- Pro: Rewrite a use-by date in seconds
- Pro: Works on glass, tins and baskets
- Pro: Cheap per label
Keep in mind
- Con: Handwriting shows
- Con: Marker needs priming before first use
Affiliate link · Price may change
How much does it cost to set up a home coffee bar?
A home coffee bar costs anywhere from about $50 to well over $1,500, and almost all of the difference is the machine. The organizers, mugs and supplies around it cost about the same for pods and espresso alike.
The table below shows typical US totals by setup, rounded, in October 2026. Prices vary by store and season.
| Setup | What it includes | Typical total |
|---|---|---|
| Starter | Your existing brewer + mat, caddy, frother | About $50 |
| Pod or drip | New pod or drip brewer + mugs, mug storage, syrups, canister | About $150 to $400 |
| Pour-over | Burr grinder, kettle, dripper, scale + storage | About $200 to $500 |
| Espresso | Espresso machine, grinder, tools, mugs, storage | About $500 to $1,500 and up |
| Furniture | A cabinet, cart or shelves, if the counter is full | Add about $60 to $400 |
To keep the cost down, buy in the order above and stop when the counter is full. Our Amazon coffee bar finds has kits for a $50, $100 and $200 budget, and the coffee bar essentials list sorts every tool into essential, upgrade and splurge. Planning on espresso? The best espresso machines for home guide compares sizes and clearances.
Your coffee bar setup checklist
Copy this into your notes and work top to bottom.
- Wrote down what I brew on a normal weekday
- Picked a spot with an outlet, counter and water nearby
- Measured width, depth, upper-cabinet gap, machine height (lid open) and outlet distance
- Checked the machine’s watts and gave it its own outlet
- Placed the machine in front of the outlet, on a mat
- Mugs on the pouring side
- Prep items in one caddy
- Backstock above or below, labeled
- Front 8 inches of counter clear
- Lights and decor last
Frequently asked questions
How do you set up a coffee bar at home?
Pick a spot with an outlet and a clear 24 to 48 inches of counter, measure the wall, the depth and the gap to the upper cabinets, then place the machine first. Add the mugs on one side, the prep items on the other, storage above or below, and decor last.
What is the best layout for a coffee bar?
Four zones in a line, in the order you use them: mugs, brew, prep, then a clear landing spot. Put the brew zone in front of the outlet, keep the front 8 inches of counter clear for pouring, and store backstock above or below so the counter only holds what you use daily.
How much counter space do you need for a coffee bar?
24 inches fits a pod brewer, a mug tree and a jar. 36 inches fits a drip brewer, a grinder and a tray. 48 inches fits an espresso machine, a grinder, a knock box and a syrup riser. Standard counters are about 25 inches deep, enough for most machines.
Can you plug an espresso machine into an extension cord?
Breville's manuals allow an extension cord only if its rating is at least the appliance's rating, it has a 3-prong grounding plug and it doesn't drape over the counter. A wall outlet is better. Never run a machine and a kettle on a light-duty cord or a cheap power strip.
How much does it cost to set up a home coffee bar?
A starter bar using a brewer you already own can come together for about $50 in organizers. A new drip or pod brewer plus mugs, storage and syrups usually lands around $150 to $400. An espresso setup with a machine and grinder often runs $500 to $1,500 or more.
What should I buy first for a coffee bar?
Buy a tape measure first if you don't own one, then the machine, then a mat and cord management, then mugs and their storage, then canisters and syrups, and decor last. Buying in that order means every item already has a measured place on the counter.
Free coffee bar size worksheet
Six numbers to measure before you buy a cabinet, cart or machine, plus a page of typical machine sizes and cabinet clearances.